English Teatime Treats
Copyright
First published in 2013
All rights reserved
© Sarah James and Pukka Cookbooks®
Sarah James asserts the right to be identified as the author of this work in accordance with Copyright, Design and Patent law.
The entirety of this book is copyright material and must not be copied, reproduced, transferred, distributed, leased, licensed, or publicly performed or used in any way except as specifically permitted in writing by the author, as allowed within the terms and conditions under which it was purchased or as strictly permitted by applicable copyright law.
Any unauthorised distribution or use of this text may be a direct infringement of the author's and publisher's rights and consequently those responsible may be liable in law accordingly.
Foreward
This is not a book about making a pot of tea or the history of tea. Nor will it tell you which plates to use or how to set the table. It's a collection of recipes I have enjoyed making with our children, nephews and nieces and which have become firm favourites with family and friends. Every recipe in this book has been tried, tested and developed over many years but this is the first time I've compiled recipes into a cookbook. Initially I set about producing a cookbook for my family and my best friend and if it wasn't for them, chances are, I'd never have written this book. I hope my English Teatime Treats bring you much enjoyment, both in the making and in the eating.
Introduction
Although I have included personal thoughts and observations throughout this book, you can skip directly to the beginning of each individual recipe; every one works as a stand alone set of ingredients and instructions. That said, I do recommend the “Notes on using this book” section as essential reading.
For me, baking is so much more than simply preparing food to eat. I know it's a cliche but I've always felt there is something special about cakes, a sense of occasion, something beyond the ordinary everyday routine.
I've always enjoyed experimenting and trying out new recipes, finding out what worked and what didn't. Years ago, my ten year old nephew asked for my secret ingredient and this is what prompted me to make notes about my cooking. I firmly believe that knowledge about cooking and food is good for everyone, young or old, male or female. Certainly our two sons and my sister's three sons grew up cooking as there was definitely no room in our house for the sentiment of cooking being only for girls.
Integral to my sense of home made treats being special are the memories evoked, mostly happy memories, some more sadly poignant but always memories worth recalling. For instance, a favourite and priceless memory is when I had ten children, ranging in age from five to ten, making their own Easter eggs. Imagine the amount of chocolate intended to travel from bowl to brush to mould which didn't quite make it – yes nephew, you know who you are! Likewise, I have baked scones for years and children always love to help. My best friend's daughter certainly liked to be a “hands on helper” – to this day I still recall her as a six year old covered from head to foot in flour.
Equally vivid memories are those associated with what has been described as a “firm favourite”, my chocolate cake recipe. This cake has appeared in countless guises including: a hedgehog covered with chocolate buttons, a train, a snake and a Christmas tree. The chocolate cake recipe has travelled with our sons to university and reportedly a home–made cake always adds something special to a stay at home dinner date.
Contrary to some observations by friends and family, I don't spend my whole life baking. However, I do always have cakes, biscuits and tarts tucked away in the freezer ready for unexpected guests, so maybe this explains their view of my being “chained to the oven”. Regardless of my actual time spent baking, friends know if they drop by for a chat they will be greeted with a cup of tea and a tasty teatime treat.
Although I have recently returned from France to live in England (where I was born and spent most of my life) my aim is to spend part of the year in France; some readers may be familiar with “Tales From the Kitchen Shed” which chronicles and explains our French connection. I taught English to French children in their homes after their main school day and we would share “Le Goûter”, a snack especially for children when they arrive home from school and just enough to keep them going until their evening meal. English scones with home–made strawberry jam and Scottish shortbread for the last day of the school term went down particularly well with the children and their parents. I really enjoyed this “cultural exchange” as a great way to share recipes and insights into each other's backgrounds.
Usually, whenever I visit friends and family in England or France, I take a cake to share over a pot of tea or a cup of coffee. Equally, even on holiday we still like afternoon tea. Not a formal, best white bone china tea service affair but simply an afternoon treat. We have friends in Guernsey (Channel Islands) and during the summer would spend days on the beach with them. A feature of the day was tea from the beach cafe kiosk where real tea in a pot along with cups and saucers was available to take onto the beach in a wooden basket. A slice of Guernsey Gâche (pronounced “Gosh”) with local butter completed the late afternoon beachside delight. Although the “Beach Baskets” are no longer available for afternoon tea, Guernsey Gâche still remains a traditional local favourite. Since Guernsey Gâche is not readily available away from the island I needed to be able to make my own and my recipe is included in this book. (A rich yeast dough tea bread with candied peel – and Guernsey butter of course)
Notes on using this book
Although I am now back in England, (where family and friends had urged me to write) much of this book came about whilst I lived in France. Friends, French and English, would ask me to make them English cakes and Christmas treats or ask for written recipes. As the recipe requests became more frequent I needed to be certain of three obvious but essential points:
In other words, although my recipes work, I needed to be sure the written versions of my recipes I was passing on worked. Receiving plenty of positive feedback, even when I'd translated my recipes into French (my French grammar is not very good), I felt confident enough to compile this cookbook.
In many areas of cooking it often doesn't matter too much if you add a little extra or a little less of an ingredient; unless of course you stray way too far from the recipe and add too much of an ingredient such as salt or chilli pepper to, say, a casserole or a curry. Cakes and pastries, however, are more of a precise art. This is not something to be afraid of, it merely goes with the territory and is something to be aware of. By way of illustration, my French neighbour, asked me to give her some "English Cake" cooking lessons, so we started with a Victoria Sandwich sponge cake. The single most important thing she said she had learned was the importance of weighing the ingredients. A Victoria Sandwich has equal weight of eggs, sugar, butter and flour – the success of the recipe depends on this and the results are a delicious light sponge. Bearing this in mind, I would recommend buying kitchen scales if you don't already have them, as using scales will greatly benefit your baking. Yes, it is spending money but kitchen scales can now be purchased quite cheaply from any good cook shop, be it online, on the high street or in the shopping mall.
You will find instances of a ![]() throughout this book and these are intended to help make your baking easier and more successful. Feedback on my inclusion of Pukka Top Tips has been very encouraging.
throughout this book and these are intended to help make your baking easier and more successful. Feedback on my inclusion of Pukka Top Tips has been very encouraging.
Baking tins (baking pans) sizes are recommended in my recipes and they suit the recipe. That's not to say you can't use different size tins but remember if you do, you may not get quite the intended results. My son made flapjack in a larger baking tin but in this case it was okay as the flapjack simply turned out thinner and crisper than usual. Change the tin size with a sponge mixture and you may not be as lucky; the sponge might burn or it might sink because it hasn't been cooked enough.
Oven temperatures are recommended but remember you need to know your own oven. If like me, you have an oven which tends to run a little too hot, you may need to turn your oven down a touch; try 10° at a time. I know some home cooks now use an oven thermometer but personally I prefer to “get to know the oven” I'm working with. I've included Celsius, Fahrenheit and Gas Mark temperature scales in the recipes but I've avoided ‘specifying’ separate temperatures for fan assisted ovens. Again, this is because all ovens (traditional, fan–assisted, expensive or otherwise,) vary and you need to know the oven you're using. However, as a general rule, lower the oven temperature by 15 – 20°C (60 – 70°F) or 1 Gas Mark when using a fan–assisted oven.
I have included alternative English words (and some brand names) for ingredients and utensils where I can, e.g. zucchini for courgette, Crisco for Trex, baking pan for baking tin. In addition to online research, I watch as many worldwide cookery programmes as I can to expand my vocabulary but readily acknowledge there are definitely some gaps in my knowledge of “American English” and “Commonwealth English”. Regardless of where you are in the world, if I have specified an ingredient or utensil you don't recognise or you can't get hold of, please contact me through the website.
Weights specified are grams (g) and ounces (oz). This is simply because “baking by weight” consistently delivers good results and avoids the confusion associated with the variations in cup sizes and ingredient densities. I do refer to teaspoon and tablespoon measurements for some dry ingredients in small quantities. All spoon measures are level unless otherwise stated: 1 teaspoon = 5ml; 1 tablespoon = 15ml. (I am currently working on a book using cup measurements for breads and scones, both of which are more forgiving in terms of “adding a bit of extra” flour or liquid)
Liquid volumes specified are millilitres (ml), Imperial fluid ounces (fl oz), tablespoons and teaspoons: 1 tablespoon = 15 ml; 1 teaspoon = 5ml. An Imperial fluid ounce equates to 28.41 ml, slightly smaller than a US fluid ounce which is 29.57 ml. For almost all the recipes in this book the question of Imperial or US fluid ounces does not cause any problems as you will see when you come to each recipe.
The specified weights and volumes are approximate conversions between metric and imperial and have been either rounded up or down. In some recipes the rounding up or down has been slightly modified. For the recipes to work at their best, use either metric or imperial – don't switch from one to the other within a recipe.
Plain flour (all purpose flour) or self–raising flour? The recipes in this book refer to self–raising flour but you may have good reason for using plain flour. In my case, whilst living in France, “Gateau” flour was expensive and not always readily available so I used plain flour and baking powder. If you substitute plain flour for self–raising flour, be sure to add baking powder in the ratio of 1 teaspoon of baking powder to each 110g (4oz) of plain flour.
The recipes refer to standard UK size large eggs, which I understand equates to extra large eggs in the USA. Talking to a relative in Australia, I'm told standard egg sizes there are the same as in the UK but I'm not sure about elsewhere in the world. If you keep your eggs in a refrigerator or a cool pantry, make sure the eggs are at room temperature before use.
This cookbook sets out to be more than a straightforward list of recipes. I wanted to include easy to follow recipes along with practical hints and Pukka Top Tips as a guide to making successful cakes and pastries. If I've succeeded, then you and your family and friends can confidently enjoy making English Teatime Treats not just for afternoon tea but at any time you fancy a treat.
All of these recipes have been tried, tested and refined over the years. They are easy to follow and in some instances techniques have been changed slightly to make them easier to achieve. If you already bake your own treats, you'll know how good “home made” can be. If you're just starting out with baking, once you've experienced the pleasure of making and eating your own cakes and treats you'll not want to buy ready–made again.
Chapter 1: Large Cakes
Included in this section are classics like the Victoria sandwich, a cake so versatile it is perfect as an afternoon tea or a delicious and elegant fresh fruit and cream dessert following an evening meal.
I firmly subscribe to the view that no cake section in a cookery book should be without a chocolate cake and I hope my chocolate fudge cake recipe will become a firm favourite in your household. For other chocolate cake recipes, check out the Pukka Cookbooks website.
Victoria Sandwich Cake
Makes: 8 – 10 portions
This is a true classic, named after Queen Victoria. Victorian bakers rose to the difficult challenge of making light and feathery sponges and paved the way for generations of home cooks. The pioneers' alternative to the arduous whisking together of eggs and sugar over a bowl of hot water to produce the elusive foam was to add soft butter to produce a rich but still tender sponge.
Sandwiched together with raspberry jam and dusted with sugar, the Victoria sandwich has achieved iconic status within the traditional afternoon tea. That said, if you fancy a delicious alternative to jam, sandwich fresh soft fruit and fresh cream (heavy cream) between the sponges and serve as a dessert.
I use the 'all in one method' for this cake, although the original recipe creams the butter/margarine and sugar together, then adds beaten eggs and lastly, folds in the flour. How well I remember having to perfect the original recipe in cookery lessons at school! Thankfully, the 'all in one' approach, beaten for two minutes is much easier and you don't have to worry about eggs curdling!
Which brings me to a word about eggs – bear with me, it's worth noting. The essential point when baking a successful Victoria sandwich is for the eggs, butter, flour and sugar to be of equal quantity by weight. Before the egg industry graded and standardised egg sizes, many sponge cake recipes would list weighing the eggs as part of the recipe instructions. Nowadays, generally speaking, weighing eggs for use in a sponge is unnecessary as commercially supplied eggs are accurately graded by size. I noticed whilst living in France my sponge cakes began turning out a little dry and this was because I was using my neighbour's eggs. Whilst Francoise's eggs were excellent free range and fresh, they came in a naturally very wide range of sizes, unlike commercially produced consistently sized eggs. When weighing the varying sized eggs I found I needed five or sometimes six eggs to match the 8 oz of the other ingredients. Once I began weighing the irregular sized eggs the results returned to a lovely soft sponge.
I tend to use sunflower margarine in my sponges for two reasons:
Ingredients
Sponge:
Filling:
Preheat oven:
Grease and line:
Place all ingredients for the sponge into a large mixing bowl and if you are using an electric hand mixer, mix for 2 minutes until completely smooth.
If you are using a stand mixer, place all the ingredients into the bowl, fix the beating paddle and beat for 2 minutes.
![]() Start your mixer on number 2 speed and gradually build up to number 6 speed to avoid flour flying everywhere. Mix until completely smooth with a good dropping consistency.
Start your mixer on number 2 speed and gradually build up to number 6 speed to avoid flour flying everywhere. Mix until completely smooth with a good dropping consistency.
Check your mixture has a good dropping consistency by lifting the mixer or beater out of the bowl. If the mixture drops easily from the beater, it is ready. If the mixture is a little stiff add another tablespoon of milk.
Pour the mixture into the prepared sponge tins, dividing equally.
Level with a spatula.
Place in the centre of the oven for 20 to 25 minutes.
The sponges are cooked when their centres feel springy to the touch and no finger imprint remains.
Remove from the oven and leave to cool in the tins for 5 minutes.
Turn the sponges out of the tins onto a wire tray to cool.
Remove the lining paper before the sponges are fully cooled.
Sandwich the sponges together with the jam of your choice and dredge with icing sugar or caster sugar.
As a more indulgent alternative to the jam filling, try 200 g (7 oz) of soft fruit – raspberries, strawberries, etc – and thick fresh cream.
I acknowledge this size of cake may be too large for some and maybe you don't want to freeze the extra portions or you simply don't want to be tempted into eating too much cake. If so, the following instructions may be useful:
When using 18 cm (7 in) sponge tins/pans:
When using 15 cm (6 in) sponge tins/pans:
Remember, one egg to every 2 ounce of butter, sugar and flour: a 6 ounce mix requires 3 eggs and a 4 ounce mix requires 2 eggs.
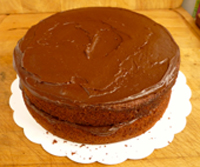
Double Chocolate Cake
Makes: 8 – 10 portions
This is my most requested recipe. When I attended a new church in France I was known as the "chocolate cake lady" by the children until they got to know me. At church and school fund raising events, people often try to 'reserve' my chocolate cake as the one they want to buy – complete with good natured banter, all in the name of charity. I would like to point out that I'm not "blowing my own trumpet" in terms of chocolate cake baking – it really is an easy recipe. The use of espresso powder really brings out the chocolatey flavour – don't worry, you won't taste coffee in the finished cake. Our sons have baked this cake for their friends and partners, with our youngest son taking it to another level (no pun intended) by serving it as a triple layer cake. To do this, make two cakes and save one layer in your freezer for another occasion.
Ingredients
Sponge:
Chocolate Fudge Icing:
Preheat oven:
Grease and line:
Place all ingredients for the sponge into a large mixing bowl and if you are using an electric hand mixer, mix for 2 minutes until completely smooth.
If you are using a stand mixer, place all the ingredients into the bowl, fix the beating paddle and beat for 2 minutes.
![]() Start your mixer on number 2 speed and gradually build up to number 6 speed to avoid flour flying everywhere. Mix until completely smooth with a good dropping consistency.
Start your mixer on number 2 speed and gradually build up to number 6 speed to avoid flour flying everywhere. Mix until completely smooth with a good dropping consistency.
Check your mixture has a good dropping consistency by lifting the mixer or beater out of the bowl. If it drops easily from the beaters, it is ready. If the mixture is a little stiff add another tablespoon of milk.
Pour the mixture into the prepared sponge tins, dividing equally.
Level with a spatula.
Place in the centre of the oven for 20 to 25 minutes.
The sponges are cooked when their centres feel springy to the touch and no finger imprint remains.
Remove from the oven and leave to cool in the tins for 5 minutes.
Turn the sponges out of the tins onto a wire tray to cool.
Remove the lining paper before the sponges are fully cooled.
For the chocolate fudge icing, heat the butter and milk together until the butter is melted – usually about 1 minute in a microwave.
If you are using the optional chocolate squares, add them to the melted butter and milk, the heat of which should melt the chocolate. If the chocolate doesn't melt, put the mixture in the microwave for 10 to 20 seconds. Be careful – it is very easy to overcook chocolate and ruin your icing.
Sift cocoa powder and icing sugar into the above and beat. Again, an electric mixer makes the job easier.
Sandwich the two sponges together using half the icing as the filling. Spread the remainder of the icing over the top of your assembled sandwich ... et voila!
Unless of course you want to dust the top with icing sugar or chocolate flakes, etc.
![]() To serve, microwave a slice of cake for 10 seconds on full power and you have chocolate cake in a warm chocolate fudge sauce!
To serve, microwave a slice of cake for 10 seconds on full power and you have chocolate cake in a warm chocolate fudge sauce!
Coffee and Walnut Cake
Makes: 8 – 10 portions
I was asked to make a coffee and walnut cake by French friends who said, they'd heard of it, never eaten it but fancied giving it a try; "Fuller's Walnut Cake", from the famous tea rooms of that name, was where they'd heard of it. Sadly, Fuller's tearooms closed in 1969 but Coffee and Walnut cake remains immortalised in "Brideshead Revisited". In France, the Salon de Thé is very fashionable, drinking tea served with a slice of gateaux or English cake.
The original recipe is for a three layer cake and the frosting is made with boiling sugar and eggs, which can be quite tricky! I've included a two layer cake recipe with an easy to make coffee topping and filling.
Ingredients
Sponge:
Coffee cream:
Decoration:
Preheat oven:
Grease and line:
Place all ingredients for the sponge into a large mixing bowl and if you are using an electric hand mixer, mix for 2 minutes until completely smooth.
If you are using a stand mixer, place all the ingredients into the bowl, fix the beating paddle and beat for 2 minutes.
![]() Start your mixer on number 2 speed and gradually build up to number 6 speed to avoid flour flying everywhere. Mix until completely smooth with a good dropping consistency.
Start your mixer on number 2 speed and gradually build up to number 6 speed to avoid flour flying everywhere. Mix until completely smooth with a good dropping consistency.
Check your mixture has a good dropping consistency by lifting the mixer or beater out of the bowl. If it drops easily from the beaters, it is ready. If the mixture is a little stiff add another tablespoon of milk.
Pour the mixture into the prepared sponge tins, dividing equally.
Level with a spatula.
Place in the centre of the oven for 20 to 25 minutes.
The sponges are cooked when their centres feel springy to the touch and no finger imprint remains.
Remove from the oven and leave to cool in the tins for 5 minutes.
Turn the sponges out of the tins onto a wire tray to cool.
Remove the lining paper before the sponges are fully cooled.
For the coffee cream filling, heat the butter and cream together until the butter is melted – usually about 1 minute in a microwave.
Dissolve espresso coffee powder or coffee granules in 2 tablespoons of boiling water and add to the melted butter and milk .
Sift icing sugar into the above and beat. Again, an electric mixer makes the job easier.
Sandwich the two sponges together using half the coffee cream filling. Use the remainder of the filling as a topping, spreading it over your assembled sandwich and decorating it with walnut halves.
Store in an airtight container and eat within 4 days.
St Clement's Orange and Lemon Victoria Sandwich
Makes: 8 – 10 portions
When it comes to flavours and tastes, the Victoria sandwich is extremely versatile, even to the extent of decorating it with your favourite flowers (preferably edible) as a topping. I love adding orange blossom flowers and when I can't get hold of them, the grated rind of orange and lemon looks good too. Equally you can always top this cake with sugarcoated candied peel.
I love to experiment and I did try lavender cake. However, be warned, you only need 2 or 3 drops of lavender oil/extract because it is so highly concentrated. I used the walnut cake butter cream recipe and replaced the coffee powder with lavender oil/extract and then decorated the sponge with lavender flowers. My family weren't too keen on this one but I loved it. They did, however, thoroughly enjoy the St Clements Orange and Lemon Victoria Sandwich.
![]() It is so much better to use unwaxed fruit if you can. Always wash your fruit but if you are using waxed fruits, make sure you scrub them in hot water to remove as much wax as possible.
It is so much better to use unwaxed fruit if you can. Always wash your fruit but if you are using waxed fruits, make sure you scrub them in hot water to remove as much wax as possible.
Ingredients
Sponge:
Orange cream:
Decoration:
Preheat oven:
Grease and line:
Place all ingredients for the sponge into a large mixing bowl and if you are using an electric hand mixer, mix for 2 minutes until completely smooth.
If you are using a stand mixer, place all the ingredients into the bowl, fix the beating paddle and beat for 2 minutes.
![]() Start your mixer on number 2 speed and gradually build up to number 6 speed to avoid flour flying everywhere. Mix until completely smooth with a good dropping consistency.
Start your mixer on number 2 speed and gradually build up to number 6 speed to avoid flour flying everywhere. Mix until completely smooth with a good dropping consistency.
Check your mixture has a good dropping consistency by lifting the mixer or beater out of the bowl. If it drops easily from the beaters, it is ready. If the mixture is a little stiff add another tablespoon of milk.
Pour the mixture into the prepared sponge tins, dividing equally.
Level with a spatula.
Place in the centre of the oven for 20 to 25 minutes.
The sponges are cooked when their centres feel springy to the touch and no finger imprint remains.
Remove from the oven and leave to cool in the tins for 5 minutes.
Turn the sponges out of the tins onto a wire tray to cool.
Remove the lining paper before the sponges are fully cooled.
For the orange cream filling, heat the butter and cream together until the butter is melted – usually about 1 minute in a microwave.
Add the orange zest to the melted butter and milk. Sift icing sugar into the above and beat. Again, an electric mixer makes the job easier.
Sandwich the two sponges together using half the orange cream as the filling. Spread the remainder of the orange cream over the top of your assembled sandwich and decorate with fresh mock orange blossom flowers; they are edible.
If you prefer a less rich cake, try six tablespoons of finely shredded orange marmalade as the filling between the two sponge layers. Dredge the top of the cake with icing sugar or caster sugar.
Lemon Cake
Makes: 8 – 10 portions
Ingredients
Sponge:
Filling:
Preheat oven:
Grease and line:
Place all ingredients for the sponge into a large mixing bowl and if you are using an electric hand mixer, mix for 2 minutes until completely smooth. If you are using a stand mixer, place all the ingredients into the bowl, fix the beating paddle and beat for 2 minutes.
![]() Start your mixer on number 2 speed and gradually build up to number 6 speed to avoid flour flying everywhere. Mix until completely smooth with a good dropping consistency.
Start your mixer on number 2 speed and gradually build up to number 6 speed to avoid flour flying everywhere. Mix until completely smooth with a good dropping consistency.
Check your mixture has a good dropping consistency by lifting the mixer or beater out of the bowl. If it drops easily from the beaters, it is ready. If the mixture is a little stiff add another tablespoon of lemon juice.
Pour the mixture into the prepared sponge tins dividing equally.
Level with a spatula.
Place in the centre of the oven for 20 to 25 minutes.
The sponges are cooked when their centres feel springy to the touch and no finger imprint remains.
Remove from the oven and leave to cool in the tins for 5 minutes.
Turn the sponges out of the tins onto a wire tray to cool.
Remove the lining paper before the sponges are fully cooled.
Sandwich the two sponges together using the lemon curd as the filling and then dust the top of the cake with icing sugar.
Swiss Roll
Makes: 6 – 8 slices
Apparently, Swiss rolls and roulades are making a comeback this year, although Swiss roll is a long established British classic and always at home on the English tea table. Whilst not being Swiss in any real sense, the Swiss roll is thought to have originated in Northern Europe with some sources citing Austria or Hungary. In the US a Swiss roll is often referred to as a Jelly Roll.
During my background research, I tracked down a copy of an old Lyons and Co catalogue from 1938, in which the Swiss roll was one of their most famous cakes with sizes and prices including “Large 9d”, “Popular 6d” and “Medium 4d”.
A Swiss roll was one of the first things I attempted to make in cookery lessons at the age of 11; I remember it was rubbery and very disappointing. I think our teacher chose Swiss roll because it's very quick to make but maybe we weren't fully aware of the need to whisk it thoroughly. I certainly didn't use a mixing bowl above a pan of hot water or a stand mixer, either of which is essential when making a light soft sponge. A thoroughly whisked sponge made correctly and rolled up with jam and cream is delicious.
![]() Eggs must be at room temperature.
Eggs must be at room temperature.
Ingredients
Preheat oven:
Grease and line:
If you are using a hand held mixer, sift icing sugar into a large clean bowl.
Beat 4 eggs together with a pinch of salt and add to sugar.
Place bowl over a pan of steaming hot water – do not let the bowl touch the water. It is the heat and steam you want.
Whisk for 8 minutes – when you remove your whisk it should leave a trail of mousse like foam.
If you prefer to use a stand mixer, sift icing sugar into the bowl and add 4 beaten eggs and a pinch of salt.
Whisk on high setting for approximately 8 minutes.
![]() Run the bowl of your stand mixer under the hot water tap/faucet to warm it and then dry thoroughly before adding the sugar and eggs.
Run the bowl of your stand mixer under the hot water tap/faucet to warm it and then dry thoroughly before adding the sugar and eggs.
The colour of your mixture will turn from bright yellow to a very pale creamy colour. It will have quadrupled in size and when you lift the whisk out of the bowl, the mixture will leave a trail of mousse like foam.
Sift the flour and cornflour into a fresh mixing bowl.
Gently sift half the flour mix onto the top of your foamy egg mixture.
Using a large metal spoon, VERY GENTLY fold in the flour mix.
Make sure you include the mixture from the very bottom of the bowl.
Gently sift the remainder of the flour mix onto the top of the mixture in the bowl and continue folding in as before, making sure you leave no pockets of flour.
Pour the mixture carefully into the prepared tin. Spread evenly with a palette knife, ensuring there is enough mixture in the corners.
![]() After evenly spreading the mixture in your tin, give the tin two sharp taps on your work surface. Don't worry. I know you have spent a long time whisking the air into your mixture but these sharp taps will ensure no big air pockets remain and you'll avoid “a holey sponge”.
After evenly spreading the mixture in your tin, give the tin two sharp taps on your work surface. Don't worry. I know you have spent a long time whisking the air into your mixture but these sharp taps will ensure no big air pockets remain and you'll avoid “a holey sponge”.
Bake in the centre of the oven for approximately 8 minutes.
The first time you make a Swiss roll with this recipe, check after 7 minutes in the oven as the sponge may be cooked. Equally, it could take up to 9 minutes before your Swiss roll is ready.
The sponge should be a light golden brown and springy to touch.
(If you cook the sponge for too long, it will crack and be a little dry. However, this is nothing a little sugar on the top and cream in the middle won't put right.)
While your Swiss roll is cooking, cut a piece of baking parchment slightly larger than the tin and dust the paper with 2 to 3 teaspoons of caster sugar.
Remove the cooked Swiss roll from the oven and immediately turn out onto the sugar dusted sheet.
Working quickly, carefully peel the lining paper off your sponge.
Roll up your sponge, using the sugar–dusted paper to help you, and then leave to cool for an hour.
Whip your cream to a soft peak.
Unroll the sponge, trim the long edges.
Spread the sponge with jam.
Using a palette knife, spread the whipped cream over the sponge, taking care to leave a small gap at the edges.
Carefully re–roll your sponge and sprinkle with caster sugar.
Store in an airtight container or eat immediately.
Your delicious Swiss roll is at its best when eaten within a few hours.
Lemon Swiss Roll
Makes: 6 – 8 slices
Make sure you use good quality lemon curd, you'll definitely taste the difference. If you fancy making your own lemon curd, you'll find a recipe on my website.
Ingredients
Preheat oven:
Grease and line:
If you are using a hand held mixer, sift icing sugar into a large clean bowl.
Beat 4 eggs together with the lemon zest and a pinch of salt and add to sugar.
Place bowl over a pan of steaming hot water – do not let the bowl touch the water. It is the heat and steam you want.
Whisk for 8 minutes – when you remove your whisk it should leave a trail of mousse like foam.
If you prefer to use a stand mixer, sift icing sugar into the bowl and add 4 beaten eggs, lemon zest and a pinch of salt.
Whisk on high setting for approximately 8 minutes.
![]() Run the bowl of your stand mixer under the hot water tap/faucet to warm it and then dry thoroughly before adding the sugar and eggs.
Run the bowl of your stand mixer under the hot water tap/faucet to warm it and then dry thoroughly before adding the sugar and eggs.
The colour of your mixture will turn from bright yellow to a very pale creamy colour. It will have quadrupled in size and when you lift the whisk out of the bowl, the mixture will leave a trail of mousse like foam.
Sift the flour and cornflour into a fresh mixing bowl.
Gently sift half the flour mix onto the top of your foamy egg mixture.
Using a large metal spoon, VERY GENTLY fold in the flour mix.
Make sure you include the mixture from the very bottom of the bowl.
Gently sift the remainder of the flour mix onto the top of the mixture in the bowl and continue folding in as before, making sure you leave no pockets of flour.
Pour the mixture carefully into the prepared tin. Spread evenly with a palette knife, ensuring there is enough mixture in the corners.
![]() After evenly spreading the mixture in your tin, give the tin two sharp taps on your work surface. Don't worry. I know you have spent a long time whisking the air into your mixture but these sharp taps will ensure no big air pockets remain and you'll avoid “a holey sponge”.
After evenly spreading the mixture in your tin, give the tin two sharp taps on your work surface. Don't worry. I know you have spent a long time whisking the air into your mixture but these sharp taps will ensure no big air pockets remain and you'll avoid “a holey sponge”.
Bake in the centre of the oven for approximately 8 minutes.
The first time you make a Swiss roll with this recipe, check after 7 minutes in the oven as the sponge may be cooked. Equally, it could take up to 9 minutes before your Swiss roll is ready.
The sponge should be a light golden brown and springy to touch.
(If you cook the sponge for too long, it will crack and be a little dry. However, this is nothing a little sugar on the top and cream in the middle won't put right.)
While your Swiss roll is cooking, cut a piece of baking parchment slightly larger than the tin and dust the paper with 2 to 3 teaspoons of caster sugar.
Remove the cooked Swiss roll from the oven and immediately turn out onto the sugar dusted sheet.
Working quickly, carefully peel the lining paper off your sponge.
Roll up your sponge, using the sugar–dusted paper to help you, and then leave to cool for an hour.
Whip your cream to a soft peak.
Unroll the sponge, trim the long edges.
Spread the sponge with lemon curd.
Using a palette knife, spread the whipped cream over the sponge, taking care to leave a small gap at the edges.
Carefully re–roll your sponge and sprinkle with caster sugar.
Store in an airtight container or eat immediately.
Your delicious Swiss roll is at its best when eaten within a few hours.
Chocolate Swiss Roll / Yule Log
Makes: 6 – 8 slices
No Christmas table should be without a traditional Yule log or Bûche Noel. If it's not Christmas time you can serve this Swiss roll with a butter cream filling and sprinkled with sugar.
Ingredients
Preheat oven:
Grease and line:
If you are using a hand held mixer, sift icing sugar into a large clean bowl.
Beat 4 eggs together with a pinch of salt and add to sugar.
Place bowl over a pan of steaming hot water – do not let the bowl touch the water. It is the heat and steam you want.
Whisk for 8 minutes – when you remove your whisk it should leave a trail of mousse like foam.
If you prefer to use a stand mixer, sift icing sugar into the bowl and add 4 beaten eggs and a pinch of salt.
Whisk on high setting for approximately 8 minutes.
![]() Run the bowl of your stand mixer under the hot water tap/faucet to warm it and then dry thoroughly before adding the sugar and eggs.
Run the bowl of your stand mixer under the hot water tap/faucet to warm it and then dry thoroughly before adding the sugar and eggs.
The colour of your mixture will turn from bright yellow to a very pale creamy colour. It will have quadrupled in size and when you lift the whisk out of the bowl, the mixture will leave a trail of mousse like foam.
Sift the flour, cocoa powder and cornflour into a separate bowl.
Gently sift half the flour and cocoa mix onto the top of your foamy egg mixture.
Using a large metal spoon, VERY GENTLY fold in the flour mix.
Make sure you include the mixture from the very bottom of the bowl.
Gently sift the remainder of the flour mix onto the top of the mixture in the bowl and continue folding in as before, making sure you leave no pockets of flour.
Pour the mixture carefully into the prepared tin. Spread evenly with a palette knife, ensuring there is enough mixture in the corners.
![]() After evenly spreading the mixture in your tin, give the tin two sharp taps on your work surface. Don't worry. I know you have spent a long time whisking the air into your mixture but these sharp taps will ensure no big air pockets remain and you'll avoid “a holey sponge”.
After evenly spreading the mixture in your tin, give the tin two sharp taps on your work surface. Don't worry. I know you have spent a long time whisking the air into your mixture but these sharp taps will ensure no big air pockets remain and you'll avoid “a holey sponge”.
Bake in the centre of the oven for approximately 8 minutes.
The first time you make a Swiss roll with this recipe, check after 7 minutes in the oven as the sponge may be cooked. Equally, it could take up to 9 minutes before your Swiss roll is ready.
The sponge should be soft and springy to the touch.
While your Swiss roll is cooking, cut a piece of baking parchment slightly larger than the tin and dust the paper with 2 to 3 teaspoons of caster sugar.
Remove the cooked Swiss roll from the oven and immediately turn out onto the sugar dusted sheet.
Working quickly, carefully peel the lining paper off your sponge.
Roll up your sponge, using the sugar–dusted paper to help you, and then leave to cool for an hour.
Unroll the sponge, trim the long edges.
Using a palette knife, spread the chocolate fudge icing over the sponge, taking care to leave a small gap at the edges.
Carefully re–roll your sponge.
If you want to make a Yule Log, cover with chocolate fudge icing and drizzle with melted dark chocolate.
Store in an airtight container or eat immediately.
Your delicious Swiss roll is at its best when eaten within a few hours.
Lemon Drizzle Cake
Makes: 8 – 10 portions
If like my sister, you like lemon cakes, you will love this one. You can double the amount of lemons if you want to get that extra lemon hit. The real bonus to lemon lovers is how easy this cake is make.
Ingredients
Sponge:
Drizzle Topping:
Preheat oven:
Grease and line:
Put all sponge ingredients into the bowl of a stand mixer.
Starting on a slow speed combine and beat, working up to a medium speed.
Beat until completely smooth. (Approximately 2 minutes)
Empty the mixture into the cake tin and and level with a spatula or palette knife.
Bake in the oven for 55 to 60 minutes
![]() To check your sponge is cooked, push a cake tester (you can use a cocktail stick as a cake tester) into the centre of the cake. When you withdraw the cake tester, it should come out clean. If there is undercooked sponge on the tester, carefully put the sponge back into the oven for another few minutes. Check again.
To check your sponge is cooked, push a cake tester (you can use a cocktail stick as a cake tester) into the centre of the cake. When you withdraw the cake tester, it should come out clean. If there is undercooked sponge on the tester, carefully put the sponge back into the oven for another few minutes. Check again.
Make the drizzle before the sponge is ready to come out of the oven.
Place all the ingredients for the drizzle into a jug and mix together to make a runny glaze.
Check your sponge is cooked.
Remove from the oven and prick the sponge all over with a skewer or a cocktail stick, as quickly as you can.
Evenly pour the drizzle over the sponge so that it trickles down into all the holes.
Leave to cool in the tin.
Slice into thick pieces to serve and enjoy the intense crunchy lemon hit of the crystalised drizzle on the top and soft lemon sponge underneath.
Orange Drizzle Cake
Makes: 8 – 10 portions
Oranges make a real change to the lemon in the previous recipe, not such a sharp hit but equally intense and crunchy with it!
Ingredients
Sponge:
Drizzle Topping:
Preheat oven:
Grease and line:
Put all sponge ingredients into the bowl of a stand mixer.
Starting on a slow speed, combine and beat, working up to a medium speed.
Beat until completely smooth. (Approximately 2 minutes)
Empty the mixture into the cake tin and and level with a spatula or palette knife.
Bake in the oven for 55 to 60 minutes.
![]() To check your sponge is cooked, push a cake tester (you can use a cocktail stick as a cake tester) into the centre of the cake. When you withdraw the cake tester, it should come out clean. If there is undercooked sponge on the tester, carefully put the sponge back into the oven for another few minutes. Check again.
To check your sponge is cooked, push a cake tester (you can use a cocktail stick as a cake tester) into the centre of the cake. When you withdraw the cake tester, it should come out clean. If there is undercooked sponge on the tester, carefully put the sponge back into the oven for another few minutes. Check again.
Make the drizzle before the sponge is ready to come out of the oven.
Place all the ingredients for the drizzle into a jug and mix together to make a runny glaze.
Check your sponge is cooked.
Remove from the oven and prick the sponge all over with a skewer or a cocktail stick, as quickly as you can.
Evenly pour the drizzle over the sponge so that it trickles down into all the holes.
Leave to cool in the tin.
Slice into thick pieces to serve and enjoy on its own or with a dash of fresh cream.
Fruits of the Forest Drizzle Cake
Makes: 8 – 10 portions
You can use quite a range of soft fruits with the drizzle cake recipe, it's often a case of what you have a surplus of or what happens to be to hand. Fruits which work particularly well include: strawberries, raspberries, blackberries, blueberries and plums.
Ingredients
Sponge:
Drizzle Topping:
Preheat oven:
Grease and line:
Put all sponge ingredients – except the mixed soft fruit – into the bowl of a stand mixer.
Starting on a slow speed, combine and beat, working up to a medium speed.
Beat until completely smooth. (Approximately 2 minutes)
Pour half of the sponge mixture into the prepared tin and level with a spatula or palette knife.
Sprinkle the mixed soft fruit evenly over the top of the mixture.
Spread remainder of the sponge mixture over the fruit and level with a spatula or palette knife.
Bake in the oven for 55 to 60 minutes
![]() To check your sponge is cooked, push a cake tester (you can use a skewer or cocktail stick as a cake tester) into the centre of the cake. When you withdraw the cake tester, it should come out clean. If there is undercooked sponge on the tester, carefully put the sponge back into the oven for another few minutes. Check again.
To check your sponge is cooked, push a cake tester (you can use a skewer or cocktail stick as a cake tester) into the centre of the cake. When you withdraw the cake tester, it should come out clean. If there is undercooked sponge on the tester, carefully put the sponge back into the oven for another few minutes. Check again.
Make the drizzle before the sponge is ready to come out of the oven.
Place all the ingredients for the drizzle into a jug and mix together to make a runny glaze; don't worry if you crush the fruit a little.
Check your sponge is cooked and remove from the oven.
Working as quickly as you can, prick the sponge all over and pour the drizzle so that it trickles into all the holes.
Leave to cool in the tin.
Slice into thick pieces and serve with fresh cream, it is delicious and can be served as a dessert too!
Peachey Drizzle Cake
Makes: 8 – 10 portions
You do need to cut the peaches into small pieces for this cake. It is delicious and like fruits of the forest drizzle cake is equally at home served as a desert. I have used orange juice in this recipe but go ahead and use lemon juice if you prefer.
Ingredients
Sponge:
Drizzle Topping:
Preheat oven:
Grease and line:
Put all sponge ingredients – except the chopped peaches – into the bowl of a stand mixer.
Starting on a slow speed, combine and beat, working up to a medium speed.
Beat until completely smooth. (Approximately 2 minutes)
Pour half of the sponge mixture into the prepared tin and level with a spatula or palette knife.
Sprinkle the chopped peaches evenly over the top of the mixture.
Spread remainder of the sponge mixture over the fruit and level with a spatula or palette knife.
Bake in the oven for 55 to 60 minutes
Make the drizzle before the sponge is ready to come out of the oven.
Place all the ingredients for the drizzle into a jug and mix together to make a runny glaze; don't worry if you crush the peaches a little.
Check your sponge is cooked and remove from the oven
Working as quickly as you can, prick the sponge all over with a skewer and pour the drizzle so that it trickles into all the holes.
Leave to cool in the tin.
Slice into thick pieces and serve with fresh cream.
Variations: You can use any soft fruit to make this cake. We usually have plenty of blackberries, these work very well on their own. Plums work equally well. So when you have a glut of soft fruit, have a go with this cake.
Yoghurt Tray Bake
Makes: 16 – 32 pieces
This isn't a traditional English cake as such, although tray bakes are very popular and work really well at school fetes and afternoon teas where there are a few extra mouths to feed. Yoghurt keeps the sponge moist and makes it easier to slice.
This yoghurt cake recipe originally contained more sugar but after tasting and testing with different quantities, we eventually settled on the amount in this recipe. I make this sponge using rape seed oil but you can use sunflower oil or any vegetable oil you prefer; I try to use oils which are low in cholesterol. This cake is a firm favourite in our house and is made at least once a week.
Ingredients
Preheat oven:
Grease and line:
Put all the ingredients into the bowl of a stand mixer fitted with the beating attachment.
Start off beating at number 1 speed, increasing the speed slowly until you get to number 4 speed.
![]() Don't go too fast or your kitchen will end up in a big mess. I was in a rush one–day and I ended up with cake mix splattered around my kitchen.
Don't go too fast or your kitchen will end up in a big mess. I was in a rush one–day and I ended up with cake mix splattered around my kitchen.
Beat for 2 to 3 minutes until all the ingredients are incorporated.
Pour the batter evenly around your tin.
![]() To get an even sponge finish, start by pouring the batter in one corner of the tin and then follow around the edges before filling in the centre of the tray with sponge mixture. Working this way will avoid your baked sponge being thin at the edges.
To get an even sponge finish, start by pouring the batter in one corner of the tin and then follow around the edges before filling in the centre of the tray with sponge mixture. Working this way will avoid your baked sponge being thin at the edges.
Bake near the bottom of the oven for 40 min until the sponge springs back when pressed.
Remove from the oven and leave to cool in the tin for at least 15 minutes before turning out onto a wire rack.
This is a very versatile cake which can be simply iced (if you fancy) and cut into squares. I often cut the plain sponge into rectangular pieces, pop them in the freezer and then defrost a single piece when needed. We love a piece of this sponge sliced in two, sandwiched around raspberries and cream and served with raspberry coulis … a real treat. It also works well if you split a portion of sponge in two and spread it with jam to make a delicious sandwich. You could, of course, simply enjoy a piece of this soft moist sponge all by itself!
Carrot Cake
Makes: 8 – 12 portions
Now I know a number of people might be thinking, “But this is an American cake!” and not at all English or British. However, carrots have been used in cakes in Britain since the Middle Ages because they contain so much natural sweetness. Whilst the exact origins of carrot cake are disputed, it seems to have started its life somewhere in Europe. During the Second World War carrots, parsnips and beetroots were all used in English cake baking to offset the shortage of sugar.
Ingredients
Preheat oven:
Grease and line:
OPTIONAL: Place the raisins in a jug or bowl and cover with boiling water. Add the bicarb and stir. Soak the raisins for 30 minutes and then drain off the liquid.
Place the oil, sugar and eggs into a large mixing bowl and beat for a couple of minutes. This is easier when using a stand mixer but you can use a hand held mixer or a good old fashioned wooden spoon!
Add carrot, raisins and walnuts – briefly mix to incorporate.
Fold in flour, baking powder and cinnamon using a large metal spoon.
Pour into tin and level with a spatula or palette knife.
Bake in the oven for approximately one hour, checking with a skewer or cocktail stick to ensure the sponge is cooked.
Carrot cake is often finished with a cream cheese topping but we like the cake “en nature” without topping.
![]() Alternative vegetable cakes can be made with this recipe. If you have a glut of vegetables in your garden or there are vegetables on offer at the supermarket or market, why not experiment a little?
Alternative vegetable cakes can be made with this recipe. If you have a glut of vegetables in your garden or there are vegetables on offer at the supermarket or market, why not experiment a little?
Raw grated vegetables work best. I have tried using cooked vegetables but they tended to make the cake too wet, especially as it's a moist cake anyway.
A few suggestions:
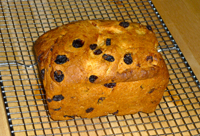
Tea Loaf or Bara Brith
Cuts into: 8–10 slices
This really is so simple to make. I first copied this recipe onto my notepad – over thirty years ago – from a scrap of paper belonging to my Mum who had scribbled down the recipe when it was passed to her by a friend. “Bara Brith” literally means “speckled bread” in Welsh. It is a beautifully moist tea bread due to the long soaking of fruit in strong black tea! Traditionally it was made with a yeasted bread dough by commercial bakers. It has developed over the years into a yeast free version and is made by many home bakers. You will be glad to hear this is a fat free cake, although once sliced and spread with butter, it doesn't remain fat free for long!
Ingredients
Preheat oven:
Grease and line:
Place the dried fruit and the brown sugar in a large mixing bowl.
Add the teabag(s) and pour over the boiling water.
Cover with cling film/plastic wrap.
Leave to soak overnight.
![]() You can make this cake extra special by using an Earl Grey tea bag or your favourite tea. If you like strong tea, try Assam and definitely use 2 teabags. You can of course, use tea made with loose tea straight from the teapot.
You can make this cake extra special by using an Earl Grey tea bag or your favourite tea. If you like strong tea, try Assam and definitely use 2 teabags. You can of course, use tea made with loose tea straight from the teapot.
Remove cling film and teabag(s).
Sift flour into the fruit tea mix and stir.
Add beaten egg and stir again, mixing well.
Makes a wet mixture.
Pour into lined loaf tin and level.
Grease a piece of foil large enough to cover the top of the tin plus 25mm (1in) to make a pleat.
Fold a pleat in the middle along the length of the foil and cover the tin.
Bake in the oven for 1 hour 15 minutes.
Leave to cool in the tins for 15 minutes before turning out onto a wire rack.
Guernsey Gâche (pronounced Guernsey “Gosh”)
Makes: 10 to 12 slices
You cannot visit Guernsey without having a slice of Gâche! It's a traditional tea bread made with an enriched yeast dough and plenty of dried fruit; Guernsey butter and milk make this rich tea bread. If you can't get hold of Guernsey butter and milk, you can still make this bread, it will just be a little paler and less rich. Gâche is Norman French for “cake” and this recipe starts off very much like a cake with the creaming together of butter and sugar.
Ingredients
Preheat oven:
Grease and line:
Beat together the sugar, butter and eggs in a large bowl for 2 minutes. You can do this in a stand mixer if you prefer.
Add the flour and yeast and mix together briefly.
Add warmed milk, fruit and candied peel or marmalade.
Mix together to form a dough and turn out on to a floured work surface.
Knead until smooth and elastic. If you are using a stand mixer, change to the dough hook at this point and knead for up to 10 minutes.
Place the dough in a greased large bowl and cover with cling film/plastic wrap.
Leave to rise in a warm place for 2 to 3 hours.
Note: The high sugar content, the eggs and the wholemeal flour slow down the yeast more than you might expect, so don't worry if it takes more than 3 hours to rise – just be patient. Sometimes I put the dough in the fridge overnight for a really slow rise before bringing it back to room temperature the next morning.
Once the dough has doubled in size, knead lightly into a loaf shape and place into the tin.
![]() To make a nice light loaf, shape the dough into a rectangle with your fingers or a rolling pin. The width of you dough rectangle should be the length of your tin. Roll up the dough and seal along the seam and the ends with your fingers. Place the dough seam side down in your tin.
To make a nice light loaf, shape the dough into a rectangle with your fingers or a rolling pin. The width of you dough rectangle should be the length of your tin. Roll up the dough and seal along the seam and the ends with your fingers. Place the dough seam side down in your tin.
Cover with a clean tea towel and leave to rise until doubled in size – this should take approximately 1 to 1 ½ hours in a warm place.
Bake in the oven for 50 minutes to 1 hour until golden brown.
Remove from the oven and leave to cool in the tin for 15 minutes.
Turn out onto a wire rack to fully cool. When you tap the base of the loaf with your fingers, it should sound hollow.
Guernsey Gâche is at its best two hours after it comes out of the oven; too hot a bread doesn't taste as good. If you cannot wait, it should be okay after 30 minutes cooling on the wire rack.
Enjoy spread with Guernsey butter if you can get hold of it. If not, a good quality butter will suffice.
![]() If you have any Guernsey Gâche left over, try toasting a slice before spreading with butter; sometimes I prefer it toasted.
If you have any Guernsey Gâche left over, try toasting a slice before spreading with butter; sometimes I prefer it toasted.
Chapter 2: Small Cakes
A sliced large cake always looks great on the tea table but a tier of individual small cakes can be just as mouth watering. The small cakes in this section are more of our family favourites and are enjoyed by many of our friends.
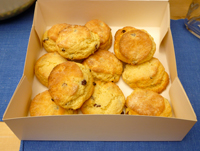
Scones
Makes: 12 large or 18 standard
Scones virtually demanded to be the first recipe in this section because traditionally no self–respecting afternoon tea would be complete without scones with jam and cream. Of course, the big cream question is, which way round do you layer the jam and cream? Tradition goes that for a Devon cream tea, it is cream first and then jam. A Cornish cream tea on the other hand is said to be jam first with Cornish clotted cream on top! Whichever way round you choose is up to you but you don't necessarily need to use cream. For me, you can't beat a freshly baked scone split horizontally in half and spread with butter and home–made jam. Our neighbours in France love scones, and that was even after they ate the first batch I gave them without slicing in half and with no butter or jam! Once I demonstrated the intended way of eating scones they were even more keen to eat the next batch.
Scones are very easy and quick to make. In fact, friends have telephoned to check I was in before they came over and twenty minutes later I'd have fresh scones on the cake tray and the kettle boiling to make a pot of tea.
There are various scone recipes to be found, the one I use has eggs in it. I've developed this recipe over the years, the use of yoghurt and bicarbonate of soda/baking soda being my most recent adaptations; the result is a light soft texture. You can substitute the yoghurt with buttermilk if you prefer as both react with bicarbonate of soda to guarantee delicious scones.
Ingredients
Preheat oven:
Grease:
Sift the flour, baking powder, bicarb and salt into a large mixing bowl.
Using your fingertips, rub the fat into flour until the mixture resembles breadcrumbs.
![]() The lighter the touch the better and not too much mixing – both contribute to a light scone effect.
The lighter the touch the better and not too much mixing – both contribute to a light scone effect.
Add sugar and stir with a spatula.
Add sultanas/golden raisins (if using) and stir again.
Form a well in the centre of the mix with your spatula.
In a small bowl beat the egg, milk and yoghurt together and pour into the well in the centre of your scone mixture.
Quickly pull the mix together – I tend to start mixing with the spatula to bring together and then use my hands to form the mixture into a ball.
The scone dough should be slightly sticky and soft. If you find the mixture is too dry, add a little milk. Keep mixing to a minimum.
Turn out your scone dough onto a floured board.
![]() NEVER roll out scone dough. Simply pat it out gently, maintaining a thick dough of at least 2 ½ cm (1in) thick. This will ensure a deep and light scone. (My friend in France, commented that her scones weren't as high is mine. Although her scones tasted great, when we went through the method together we discovered she'd rolled out her dough too thinly)
NEVER roll out scone dough. Simply pat it out gently, maintaining a thick dough of at least 2 ½ cm (1in) thick. This will ensure a deep and light scone. (My friend in France, commented that her scones weren't as high is mine. Although her scones tasted great, when we went through the method together we discovered she'd rolled out her dough too thinly)
Cut out your scones using a circular pastry/cookie cutter. Push down your cutter quickly using the palm of your hand and don't twist the cutter.
If you want large scones use a 70mm (2 ¾ ins) cutter or a 58mm (2 ¼ ins) for slightly smaller scones.
You will need to bring the trimmings back together to be used for cutting out the remainder of your scones.
Remember: lightly pat back together, don't overwork or you will have tough scones!
Place your scones on a greased baking tray – alternatively use a silicone lining sheet and there's no need to grease.
Brush the top of your scones with milk or egg wash or, if you prefer, dust with flour.
Bake in the oven for 12 to 15 minutes (large) or 10 to 12 minutes (standard) until golden brown.
Cool on a wire rack, uncovered if you prefer a crispy top or covered loosely with a cloth for softer topped scones.
Serve with home–made strawberry jam and a generous mound of clotted cream or simply with butter and jam.
Eat your scones while they are as fresh as possible, definitely on the day they are baked. You can freeze any leftovers but you may well find, as in our house, this doesn't happen very often.
Variations: for a wholemeal/wholewheat scone, use half white flour and half wholemeal/wholewheat. Using all wholemeal/wholewheat results in too dense a scone.
Why not try blueberry scones? Add 75 g (3 oz) fresh blueberries and 2 teaspoons of grated lemon rind after the addition of egg, milk and yoghurt but before you bring your mixture together to form a dough.
Cheese Scones
Makes: 8 to 10 scones
No jam required with these! They are perfect served with an afternoon tea or on a winter's day tucked up by the fire served with plenty of butter.
Ingredients
Preheat oven:
Grease:
Sift flour, salt, English mustard powder and cayenne pepper (if using it) into a large mixing bowl.
Using your fingertips, rub the fat into flour until the mixture resembles breadcrumbs.
![]() Remember, the lighter the touch the better and not too much mixing – both contribute to a light scone effect.
Remember, the lighter the touch the better and not too much mixing – both contribute to a light scone effect.
Add cheese (saving a tablespoon for the topping) and stir with a spatula to mix.
Form a well in the centre of the mix with your spatula.
In a small bowl beat the egg and milk together and pour into the well in the centre of your scone mixture.
Quickly pull the mix together – I tend to start mixing with the spatula to bring together and then use my hands to form the mixture into a ball.
The scone dough should be slightly sticky and soft. If you find the mixture is too dry, add a little milk. Keep mixing to a minimum.
Turn out your scone dough onto a floured board.
![]() Don't roll out your scone dough. Simply pat it out gently, maintaining a thick dough of at least 2 ½ cm (1in) thick. This will ensure a light high scone.
Don't roll out your scone dough. Simply pat it out gently, maintaining a thick dough of at least 2 ½ cm (1in) thick. This will ensure a light high scone.
Cut out your scones using a 58 mm (2 ¼ ins) round pastry/cookie cutter and place on greased baking tray. (Alternatively use a silicone lining sheet and there's no need to grease)
You will need to bring the dough trimmings back together to make the remainder of scones. Remember: lightly pat back together, don't overwork the dough or you will have tough scones.
Brush with milk or egg wash, sprinkle with cheese and a tiny sprinkle of cayenne if you like a bit of heat.
Pop in the oven for 12 to 15 min until golden brown.
Place on a wire cooling tray to cool slightly – they are delicious served warm. That said, cheese scones are equally good when served at room temperature with an afternoon tea or on a picnic.
Derby Scones
Makes: 8 to 10 scones
Derby scones, are made with currants and finished off with a lovely crunchy sugar topping! Derby is a city in the East Midlands close to where I was born but I'm told Derby scones are available throughout the UK.
Ingredients
Preheat oven:
Grease:
Sift the flour, bicarb and salt into a large mixing bowl.
Using your fingertips, rub the fat into flour until the mixture resembles breadcrumbs.
![]() The lighter the touch the better and not too much mixing – both contribute to a light scone effect.
The lighter the touch the better and not too much mixing – both contribute to a light scone effect.
Add sugar and stir with a spatula.
Add currants and stir again.
Form a well in the centre of the mix with your spatula.
Pour milk and yoghurt together into the well in the centre of your scone mixture.
Quickly pull the mix together – I tend to start mixing with the spatula to bring together and then use my hands to form the mixture into a ball.
The scone dough should be slightly sticky and soft. If you find the mixture is too dry, add a little milk. Keep mixing to a minimum.
Turn out your scone dough onto a floured board.
![]() NEVER roll out scone dough. Simply pat it out gently, keeping a thick dough, at least 2 ½ cm (1 ins). This will ensure a deep and light scone.
NEVER roll out scone dough. Simply pat it out gently, keeping a thick dough, at least 2 ½ cm (1 ins). This will ensure a deep and light scone.
Cut out your scones using a 58 mm (2 ¼ ins) round pastry/cookie cutter. Push down your cutter quickly using the palm of your hand and don't twist the cutter.
You will need to bring the trimmings back together to be used for cutting out the remainder of your scones.
Remember: lightly pat back together, don't overwork or you will have tough scones!
Place your scones on greased baking tray – alternatively use a silicone lining sheet and there's no need to grease.
Brush with milk or egg wash and sprinkle with granulated sugar.
Pop in the oven the 12 to 15 min until golden brown.
Cool uncovered on a wire rack.
Delicious cut in half and spread with butter. You can add jam if you wish.
Welsh Cakes
Makes: Approximately 20
A friend of ours, one of the other Mums in our children's playgroup, introduced us to these little griddle cakes. Having relocated from Wales to Leicester, she said making Welsh Cakes with us reminded her of home and making cakes with her mum. Welsh Cakes are delicious and very easy to make. Our four boys loved mixing the dough and then popping the cakes on the griddle before waiting impatiently for them to brown – only two or three minutes each side but a long time for a small child! If you haven't got a griddle pan, a heavy solid frying pan will do the trick! Sprinkle a little caster sugar on top of your Welsh cakes and you'll have a teatime treat in minutes.
Ingredients
Sift flour into a large mixing bowl.
Rub fat into flour until it resembles breadcrumbs.
Stir in currants and sugar.
Beat the egg and 1 tablespoon of milk together before adding to the mixture.
Bring the dough together into a ball, if the mixture is too dry, add another tablespoon of milk. (You need to be able to roll out the dough just as you would pastry)
Place on a floured work surface and roll out to about 13mm (½ ins) thick.
Cut into rounds using a 63 mm (2 ½ ins) pastry cutter.
Bring the trimmings together, re–roll and cut more rounds.
Heat griddle or frying pan to a medium heat – not too high because you want the dough to cook through.
![]() Grease griddle only very lightly – you do not want to fry your Welsh cakes!
Grease griddle only very lightly – you do not want to fry your Welsh cakes!
Cook cakes in batches for 2 or 3 minutes each side until brown and crisp on the outside.
Sprinkle with sugar and enjoy!
You can serve with jam, honey and butter but I don't think you can beat them tossed in sugar straight from the griddle.
Scotch Pancakes
Makes: 20 to 24
Scotch Pancakes (also known as Drop Scones) are cooked on a griddle – also called a “girdle” in Northumberland and Scotland. Although very similar to American pancakes, Scotch Pancakes are not usually served with bacon and maple syrup; more often than not they are served with jam and cream. That said, I have seen Scotch Pancakes served in English restaurants drizzled with maple syrup and accompanied by scoops of ice cream.
At a diameter of approximately 9 cm ( 3 ½ ins), Scotch Pancakes tend to be smaller than their American counterparts. I prefer to use a small ladle to drop my batter onto the girdle as I find this much easier compared to using a tablespoon.
Ingredients
Sift all dry ingredients into a large bowl or large measuring jug.
Form a well in the centre of your mix, place the cracked egg into your well and start whisking.
Gradually add the buttermilk (or milk and yoghurt mixture) whisking as you go until you have a lump free batter.
Heat the girdle or heavy frying pan (I use my French crêpe Pan)
Grease with oil or white fat but not butter as it will burn.
![]() To test if the girdle is hot enough, drop a teaspoon of mixture onto the girdle and it should cook in 1 minute.
To test if the girdle is hot enough, drop a teaspoon of mixture onto the girdle and it should cook in 1 minute.
Drop a full tablespoon of the mixture (or use a small ladle) onto the hot girdle.
Space the mixture drops well apart and wait until you see little bubbles over most of the pancake before turning them over – 3 to 4 minutes at most.
When cooked on both sides, place on a wire tray and cover with a clean cloth to keep them warm.
Serve with honey or jam and/or butter.
They are also ideal as a quick dessert, served with fruit and ice cream.
English Teacakes
Makes: 12
I love these teacakes split in half, toasted and then spread with butter whilst still hot but they are equally delicious served freshly baked and cooled to room temperature. Most tearooms in Britain will serve a toasted teacake with a pot of tea. Just enough to keep you going until your main meal of the day.
You can find many sweetened dough recipes and cooks tend to have their own preference. I've adapted this recipe over the years and now use it as a base for many of my yeast cakes, loaves and tea breads; I even use it to make the dough for a dessert pizza.
Ingredients
Preheat oven:
Grease:
![]() Bicarbonate of soda reacts with both buttermilk and yoghurt to make a lovely light and soft dough. I did once forget to include the bicarb and the difference was really noticeable.
Bicarbonate of soda reacts with both buttermilk and yoghurt to make a lovely light and soft dough. I did once forget to include the bicarb and the difference was really noticeable.
Warm up the buttermilk (or milk and yoghurt mixture) for one minute in a microwave on full power. The liquid temperature needs to be tepid to warm so as to encourage the yeast to start working but too much heat will kill the yeast. Gently warm the liquid in a saucepan if you don't have a microwave.
Combine all the ingredients, except the milk or eggwash, in either the bowl of an electric mixer with a dough hook fitted or in a large mixing bowl.
Mix on slow speed number one for approximately 1 – 2 minutes and then on speed number two for 8 – 10 minutes.
If mixing by hand, stir the ingredients together until they form a ball and then knead for 10 – 12 minutes.
Check your dough is sufficiently smooth and elastic to pass the window pane test:
![]() The window pane test is a consistently reliable way to check your dough is ready. Pinch off a small piece of dough and gently stretch it apart, pulling and rotating the dough into a thin membrane, or windowpane, which is translucent when you hold it up to the light.
The window pane test is a consistently reliable way to check your dough is ready. Pinch off a small piece of dough and gently stretch it apart, pulling and rotating the dough into a thin membrane, or windowpane, which is translucent when you hold it up to the light.
Place your dough in a large greased mixing bowl and leave to rest in a warm place for at least 1 ½ hour or until doubled in size.
Transfer the dough to a floured work surface and divide into 12 portions.
Shape into balls and place on baking sheets – leave plenty of room between your teacakes.
Gently press the balls of dough to flatten them a little; this makes the tea cake shape.
Cover with cling film/plastic wrap or a damp tea towel and leave to rise in a warm place for approximately 30 – 45 minutes.
Brush with egg or milk wash and bake in the oven for 15 minutes until golden brown.
Hot Cross Buns
Makes: 18
Although hot cross buns are a traditional Easter treat, we love eating them at any time of the year. In France hot cross buns aren't readily available, so I tend to make them for friends as an Easter gift.
Just like the English teacakes, hot cross buns are delicious toasted.
Ingredients:
Dough:
Glaze:
Hot cross pastry:
Preheat oven:
Grease:
![]() Bicarbonate of soda reacts with both buttermilk and yoghurt to make a lovely light and soft dough. I did once forget to include the bicarb and the difference was really noticeable.
Bicarbonate of soda reacts with both buttermilk and yoghurt to make a lovely light and soft dough. I did once forget to include the bicarb and the difference was really noticeable.
Warm up the buttermilk (or milk and yoghurt mixture) for one minute in a microwave on full power. The liquid temperature needs to be tepid to warm so as to encourage the yeast to start working but too much heat will kill the yeast. Gently warm the liquid in a saucepan if you don't have a microwave.
Combine all the dough ingredients, in either the bowl of an electric mixer with a dough hook fitted or in a large mixing bowl.
Mix on slow speed number one for approximately 1 – 2 minutes and then on speed number two for 8 – 10 minutes.
If mixing by hand, stir the ingredients together until they form a ball and then knead for 10 – 12 minutes.
Check your dough is sufficiently smooth and elastic to pass the window pane test:
![]() The window pane test is a consistently reliable way to check your dough is ready. Pinch off a small piece of dough and gently stretch it apart, pulling and rotating the dough into a thin membrane, or windowpane, which is translucent when you hold it up to the light.
The window pane test is a consistently reliable way to check your dough is ready. Pinch off a small piece of dough and gently stretch it apart, pulling and rotating the dough into a thin membrane, or windowpane, which is translucent when you hold it up to the light.
Place your dough in a large greased mixing bowl and leave to rest in a warm place for at least 1 ½ hours or until doubled in size.
Transfer your dough to a floured work surface and divide into 18 portions.
Shape into balls and place on a baking tray.
Cover with cling film/plastic wrap or a damp tea towel and leave to rise for approximately 45 minutes in a warm place.
While your hot cross buns are proving, make your pastry for the crosses. It isn't really a pastry at all and it's much easier than making and rolling out pastry strips (unless of course, you have any leftovers)
Sift flour into a small jug.
Add water and mix well until you have a smooth paste.
When the hot cross buns have risen, pipe or use a spoon to form the crosses on the buns.
![]() To get a professional looking finish, form a cone using greaseproof paper or baking parchment. Spoon the paste into the makeshift icing bag and cut off the end. You are ready to ice the crosses.
To get a professional looking finish, form a cone using greaseproof paper or baking parchment. Spoon the paste into the makeshift icing bag and cut off the end. You are ready to ice the crosses.
![]() It's easier to mark all the vertical lines in one pass as you work along each row of buns. Simply go back and mark the horizontals in the same way.
It's easier to mark all the vertical lines in one pass as you work along each row of buns. Simply go back and mark the horizontals in the same way.
Place in the oven for 25 to 30 minutes until golden brown.
Half way into the cooking time for your buns, make your sugar glaze.
Add the sugar and water to a small heavy based saucepan, over a low to medium heat, stirring only until the sugar is dissolved and the mixture is bubbling. Let the syrup bubble away for a couple of minutes until you have a sticky glaze.
![]() Do not stir your sugar syrup whilst it's boiling or you will end up with a crystallised glaze.
Do not stir your sugar syrup whilst it's boiling or you will end up with a crystallised glaze.
As soon as the hot cross buns come out of the oven, brush them with your glaze and then leave to cool on a wire tray.
Chelsea Buns
Makes: 16
Believe it or not Chelsea buns, which have been made since the 1700s, also have a connection with Easter time and hot cross buns. The Chelsea Bun House was famous for selling buns hot from their ovens and they claim to have invented both the hot cross bun and the Chelsea bun; the original Chelsea Bun House was situated in Pimlico on the border with Chelsea. George II and George III bought Chelsea buns from the shop and this contributed greatly to the fame of the Chelsea bun, as did the literary references found in both Swift and Dickens. Accounts tell of Good Friday in 1829 when 240,000 hot cross buns were sold and crowds of over 50,000 queued outside, eagerly awaiting the next batch of buns.
Enough of the history detour, back to the recipe. Originally the dough was enriched with eggs and milk but I use my trusty sweetened dough recipe as it delivers a lovely light bun. The recipe is rich enough because of the butter, sugar and dried fruit inside the pinwheel.
Ingredients:
Dough:
Filling:
Milk glaze:
Preheat oven:
Grease and line:
![]() Bicarbonate of soda reacts with both buttermilk and yoghurt to make a lovely light and soft dough. I did once forget to include the bicarb and the difference was really noticeable.
Bicarbonate of soda reacts with both buttermilk and yoghurt to make a lovely light and soft dough. I did once forget to include the bicarb and the difference was really noticeable.
Warm up the buttermilk (or milk and yoghurt mixture) for one minute in a microwave on full power. The liquid temperature needs to be tepid to warm so as to encourage the yeast to start working but too much heat will kill the yeast. Gently warm the liquid in a saucepan if you don't have a microwave.
Combine all the dough ingredients, in either the bowl of an electric mixer with a dough hook fitted or in a large mixing bowl.
Mix on slow speed number one for approximately 1 – 2 minutes and then on speed number two for 8 – 10 minutes.
If mixing by hand, stir the ingredients together until they form a ball and then knead for 10 – 12 minutes.
Check your dough is sufficiently smooth and elastic to pass the window pane test:
![]() The window pane test is a consistently reliable way to check your dough is ready. Pinch off a small piece of dough and gently stretch it apart, pulling and rotating the dough into a thin membrane, or windowpane, which is translucent when you hold it up to the light.
The window pane test is a consistently reliable way to check your dough is ready. Pinch off a small piece of dough and gently stretch it apart, pulling and rotating the dough into a thin membrane, or windowpane, which is translucent when you hold it up to the light.
Place your dough in a large greased mixing bowl and leave to rest in a warm place for at least 1 ½ hours or until doubled in size.
Make a sugar butter by creaming butter and sugar together in a small bowl.
Transfer the dough to a floured work surface and divide into two.
Roll out each piece into a rectangle about 40 cm x 15 cm (16ins x 6 ins).
Spread the sugar butter over both rectangles of dough.
Sprinkle the dried fruit over the sugar buttered dough rectangles.
Starting from the long side, lightly roll up the dough rectangles like a Swiss roll or jelly roll.
With a sharp knife cut each roll into 8 even slices.
Lay slices flat in the greased roasting tin – leave an even gap between the slices as they will also expand horizontally as they rise.
![]() Leave no more than 2 ½ cm (1 ins) between each bun. The hallmark of the Chelsea bun is its square shape – if you leave too large a gap your Chelsea buns will retain their original circular shape.
Leave no more than 2 ½ cm (1 ins) between each bun. The hallmark of the Chelsea bun is its square shape – if you leave too large a gap your Chelsea buns will retain their original circular shape.
Leave to rise for approximately 30 to 45 minutes until well risen.
Bake in the oven for 20 to 25 minutes until golden brown.
While your Chelsea buns are cooking make the milk glaze by heating the sugar in the milk in a small saucepan until the sugar is dissolved. Do not boil!
5 minutes before the end of cooking, remove your Chelsea buns from the oven, brush with glaze and then pop them back in the oven for the final few minutes.
Remove from the oven and leave to rest for 10 minutes.
Carefully turn out the Chelsea buns in one whole piece and, if you can resist them, leave them to cool
When cooled, gently pull the individual buns apart and enjoy.
Crumpets
Makes: 8 – 12
Crumpets are quintessentially British. Sold on the street in Victorian times by the muffin man; back in the 1930s they sold for a halfpenny each. Crumpets are a source of great debate in Elizabeth David's English Bread and Yeast Cookery, as to exactly what is a crumpet, a pikelet or a muffin. As a young girl I used the word pikelet to refer to what most people call a crumpet, pikelet being the name widely used in the Midlands.
I can confidently say there's nothing like a home–made crumpet. I'd eaten shop bought crumpets for years but ironically I'd never tasted home–made crumpets until we lived in France. Not that the French were big into crumpets, they simply weren't available to buy, so if you wanted them you made your own. My son and I enjoyed making the crumpet batter but since we didn't have any crumpet rings, we made them without, so in fact we made pikelets – which are like rather thick holey pancakes. We enjoyed them so much we sat and ate them in one sitting.
This recipe is my take on Elizabeth David's crumpet recipe, using 21st–century methods and updated research on how to get the batter to work. The result, although not often made at home, is a real teatime treat which is well worth the bit of effort required.
Ingredients
Grease:
Put milk, 300ml (11 fl oz) of water and 2 tablespoons of oil into a jug and heat in the microwave on full power for 30 – 45 seconds until just warm.
Sift flour into the bowl of a stand mixer with a beater attachment.
Mix in the salt and the sugar.
![]() Always make sure the salt is well mixed in before you add any yeast because salt kills yeast.
Always make sure the salt is well mixed in before you add any yeast because salt kills yeast.
Add yeast and mix in.
Pour a little of the milk, water and oil from the jug into the mixing bowl and beat on low speed until well combined and lump free.
Add the remainder of the milk, water and oil a little at a time, ensuring it is well incorporated.
Once all the milk, water and oil is added, turn the speed up to a medium fast speed and beat for 5 minutes.
Check the mixture is ready by pulling out a teaspoon full of the mixture; it should be stretchy and hang from the spoon.
![]() The mixture should look like chewing gum on a warm day. It's the same principle as bread – you need to check the gluten has started working but remember it is a batter you are working with. So use a teaspoon to pull out the mixture and check it is nice and stretchy.
The mixture should look like chewing gum on a warm day. It's the same principle as bread – you need to check the gluten has started working but remember it is a batter you are working with. So use a teaspoon to pull out the mixture and check it is nice and stretchy.
Cover with a lid or cling film/plastic wrap and put in a warm place to rise and bubble for between 1 to 1 ½ hours.
By this time bubbles should have appeared over the whole of the surface.
Dissolve bicarb in 150 ml (5 fluid oz) of tepid water and, using a wooden spoon, break into your bubbles and gently stir in the bicarb solution. It's just like making honeycomb toffee – it will erupt with bubbles.
Cover the bowl and put back into a warm place for about 30 minutes.
Place your greased griddle pan over medium heat and wait for it to heat up before adding the greased crumpet rings.
I usually cook four crumpets at a time, simply because I only have four crumpet rings. If you're fortunate enough to have more crumpet rings and a big enough griddle pan, you can cook up to eight at a time.
As soon as the pan is hot, pour a ladle of the mixture into each ring, filling it to ¾ full.
Let them cook for about 7 to 8 minutes until the top of the crumpet has formed a skin. Lots of tiny holes should appear on the top, appearing first as bubbles which burst to provide the holes. This is what provides the traditional look of the crumpet, ready for butter to melt into the holes.
![]() If the batter seeps between the griddle and the bottom of the ring, it's too thin and you should whisk in more flour, 1 tablespoon at a time. If you don't get any holes appearing in the top of your crumpets, the mixture is too thick and you should add more water, again 1 tablespoon at a time. You need the holes in the top of your crumpets – after all, you don't want to spread butter on your crumpet only for it to pour off the sides as it melts.
If the batter seeps between the griddle and the bottom of the ring, it's too thin and you should whisk in more flour, 1 tablespoon at a time. If you don't get any holes appearing in the top of your crumpets, the mixture is too thick and you should add more water, again 1 tablespoon at a time. You need the holes in the top of your crumpets – after all, you don't want to spread butter on your crumpet only for it to pour off the sides as it melts.
I'm lucky to have a nonstick egg ring set with a central handle which holds each ring in place and I am able to remove the crumpet rings without burning my fingers. BE CAREFUL when moving the hot crumpet rings, use a large spoon and fork if yours don't have any handles.
Once you have removed the crumpet rings, turn over your crumpets and cook for a further 2 to 3 minutes.
Regrease and reheat rings before the next batch.
When cooked on both sides, the crumpets will be golden brown on the bottom and quite pale on the holey top.
Keep the crumpets warm in a clean tea towel or the warming drawer of your oven or leave to cool in a clean tea towel for toasting later.
You can either enjoy warm crumpets from the griddle or alternatively, toast them from cold. Whichever way you choose, spread with butter and let it melt into the holes.
Butterfly Cakes (Fairy Cakes)
Makes: 12
Children love making and eating butterfly cakes and they were always very popular at our family birthday parties. Although the rise of the cupcake seems to mean there are fewer simple butterfly or fairy cakes around these days, there remains a certain fascination with butterfly cakes. Perhaps the idea of an individual sponge cake in a paper case, generally smaller than a cupcake, and decorated with bright colours is the enduring appeal ? Butter icing or chocolate sprinkled with “hundreds and thousands” (sprinkles) certainly catch the eye and promise a delightful sugar rush.
Ingredients
Sponge:
Toppings:
Preheat oven:
Line with paper cases:
Make the sponge mix by placing all the ingredients into a large bowl and beat for 2 minutes with a wooden spoon or electric mixer.
Check your mixture has a good dropping consistency by lifting the wooden spoon or the electric beater above the mixing bowl. If your mixture drops easily, it's ready. If the mixture is a little stiff, mix in another tablespoon of milk.
Put a dessert spoon of the mix into each paper case.
Pop into the centre of the oven for about 15 minutes until the cakes are golden and just firm to the touch.
Carefully remove individual cakes from the tin and leave on a wire rack to cool.
Make your buttercream by melting the butter and milk in the microwave for 1 minute.
Sift in the icing sugar and beat to a smooth butter.
Add vanilla extract and beat again to incorporate.
To assemble the butterfly cakes: slice off the domed top of each cake and cut the removed slice in half – these are the “wings” of each butterfly.
Spoon or pipe buttercream onto the exposed top of each cake and carefully place your “wings" into the buttercream to resemble the wings of a butterfly.
Dust with icing sugar.
Alternatively, you can assemble your butterfly cakes using lemon curd spooned onto the cakes instead of buttercream.
Equally attractive are whole cakes topped off with a swirl of buttercream and a few multi–coloured sugar sprinkles. Be creative, they are your cakes and you can decorate them however you wish.
Variations:
Rock Cakes
Makes: Approximately 12
Another teatime treat that made it to our children's birthday teas each year. Again, so easy to make the children usually helped, complete with sticky dough hands and fingers!
Rock cakes are best eaten the day they're baked but I honestly can't remember a time in our family when there were any left beyond the first day – they simply didn't make it!
Ingredients
Preheat oven:
Grease and line:
Sift flour and sugar into a large mixing bowl.
Add margarine and rub in with your fingertips until the mixture resembles fine breadcrumbs.
Stir in the fruit.
In a small bowl or jug whisk the eggs and milk together and then pour onto the fruit mixture.
Stir with a wooden spoon until your mixture forms a stiff dough. If it is too dry, add a touch more milk but be careful because you want the mixture to be stiff enough for you to heap it on the baking trays.
Using 2 teaspoons, shape the mixture into 12 rough mounds or heaps on the baking trays.
Sprinkle with demerara sugar.
Pop in the oven for approximately 15 minutes until golden colour and firm to the touch.
Place on a wire tray to cool.
Best eaten the same day or pop them in the freezer.
![]() If children are making these with you, let them use their hands to shape spiky heaps onto the baking tray!
If children are making these with you, let them use their hands to shape spiky heaps onto the baking tray!
Melted Moments or Viennese Whirls
Makes: 12
Technically, these little cakes are biscuits because they are so short but we always serve them as cakes – our youngest son's favourite. If you can get hold of raspberry jelly, it makes them more like the melted moments you buy at a bakery. (There is a recipe for raspberry jelly on the Pukka Cookbooks website)
Ingredients
Preheat oven:
Line with paper cases:
Place all ingredients (apart from the jam or jelly) into a large mixing bowl and beat together to form a soft dough, working as quickly as possible. Beating the ingredients together can be done by hand or in a mixer.
If you want to use a piping bag:
Pipe swirls of mixture into the paper cases leaving a space in the centre of the swirl for the jam.
By hand:
Divide mixture into 12 equal portions and push into the paper cases; make an indent with your thumb in the centre ready for the jam.
Pop in the oven 20 to 25 minutes.
Let them cool for at least 20 minutes.
Using a teaspoon put a little jam into each indent.
Dust with icing sugar.
Chapter 3: Pastry Recipes
In this chapter there are recipes which use either shortcrust, rich shortcrust or flaky pastry, so I've started with a section on how to make each of these. For ease of use and navigation, the individual tart, pie or cake recipe shows a link to the relevant pastry as necessary.
I love to make other types of pastry (one of my favourites being choux) and I'm working on a book of our favourite dessert recipes at the moment. Hopefully this will be published soon.
Shortcrust Pastry
Sufficient for:
Blackberry and Apple Crumble Tart
Great Grandma's Coconut Currant Tarts
The traditional shortcrust pastry is always half fat to plain (all purpose) flour. The shortening agent is usually half lard and half butter or margarine. Here in the UK I prefer to use Trex (Crisco) if I can get it. I like to make my pastry in a stand mixer since I have warm hands and that isn't good for pastry making! Besides, using the mixer is much quicker and produces excellent pastry.
Ingredients
![]() Make double the amount you need and freeze half, it always comes in handy.
Make double the amount you need and freeze half, it always comes in handy.
Sift flour and salt into the bowl of a stand mixer.
Add diced fat and beat on slow until the mixture resembles fine breadcrumbs.
Add water and mix on slow until the pastry starts to form.
Remove from the bowl and form into a flat thick circle. Cover with cling film/plastic wrap and leave to stand in the fridge for 30 minutes, until firm but not hard.
PUKKA TOP TIP: Don't be tempted to omit leaving your pastry in the fridge; it is an essential stage if you want good pastry.
If you want to make the pastry by hand, sift flour and salt into a large mixing bowl.
Add diced fat and toss it in flour.
Rub fat into flour until it resembles fine breadcrumbs.
![]() Don't let your fingers rub against each other or the friction will melt the butter.
Don't let your fingers rub against each other or the friction will melt the butter.
Add water and bring together to form a dough.
Knead briefly, wrap in cling film/plastic wrap and put in the fridge.
Rich Sweet Shortcrust Pastry or Pâté Brisée
Sufficient for:
Blackberry and Apple Crumble Tart
This pastry has a higher ratio of fat to flour than traditional shortcrust pastry, plus it is further enriched with the addition of egg and sugar. Widely used in France, brisée refers to the word sand, in that when the fat is rubbed into the flour the mixture should resemble fine sand.
I like to make my pastry in a stand mixer because I have warm hands and that is not good pastry making! Besides, using the mixer is much quicker and easier and produces excellent pastry. Many have friends asked me for my pastry making secret but there isn't one – I use my trusty KitchenAid every time and it hasn't let me down yet!
Ingredients
Sift flour and salt into the mixing bowl of a stand mixer.
Add caster sugar and cubes of butter.
Mix on slow with the paddle attachment until the mixture resembles fine breadcrumbs.
Briefly whisk egg yolk and water in a small bowl; pour egg and water mix onto the pastry mix.
Mix on slow (number 2 speed) until the pastry forms. (This shouldn't take very long at all, less than a minute. You don't want to overwork the pastry)
![]() Freeze leftover egg white as it freezes exceptionally well. Simply put into a container in the freezer and write on the label each time you add an egg white. I take the egg whites out of the freezer when I have enough to make a meringue.
Freeze leftover egg white as it freezes exceptionally well. Simply put into a container in the freezer and write on the label each time you add an egg white. I take the egg whites out of the freezer when I have enough to make a meringue.
Wrap pastry in cling film/plastic wrap and leave in the fridge for 30 minutes, until firm but not hard. It is essential to give the pastry a rest to ensure good results. Unlike bread which requires full gluten development, a good pastry requires the opposite, chilling retards the gluten.
Flaky Pastry or Rough Puff Pastry
Sufficient for:
I must admit, I don't make this pastry often enough – there are always so many things to be done and this pastry needs to be made in advance. Shop bought puff pastry is really very good these days but when I have time, I do like to make my own version, ie, flaky pastry or rough puff pastry. Considerably easier to make than traditional puff pastry, this recipe is for you if you fancy having a go at a home–made alternative which uses the same techniques as the original but which cuts out all the faff of rolling out a block of butter and placing it between a flour and water dough. The recipe starts off by rubbing some of the fat into the flour just like shortcrust pastry but the rest of the butter is dabbed on similar to plastering a wall. (My husband and sons will not appreciate my summary of skilled plastering as “dabbed on”)
Ingredients
Divide the butter into 4 equal portions.
Sift flour into a large mixing bowl.
Rub a portion of the butter into the flour until it resembles breadcrumbs.
Add lemon juice and 100 ml iced water and bring together to form a dough.
Knead briefly until smooth.
Roll out dough on a floured work surface to a large rectangle 40 cm (16 ins) x 25 cm (10 ins).
Dot and dab a portion of butter onto the top two thirds of the dough rectangle.
Fold the dough into three as if it were a business letter, starting with the bottom (unbuttered) section.
Seal the open seams with the edge of your hand.
Rotate your block of pastry though 90 degrees so the long seam is on your left.
Wrap your block of pastry in cling film and pop in the fridge for at least 15 minutes, 30 minutes is better if you have the time.
The rolling, folding, rotating and chilling constitutes a “turn”.
Repeat the process twice more using the remaining two portions of butter, ie, two more “turns”.
Complete one final turn, but this time without butter.
![]() Always start with the long seam of your pastry to the left – this ensures you've rolled and rotated your pastry to give maximum layers of puff pastry in the final product.
Always start with the long seam of your pastry to the left – this ensures you've rolled and rotated your pastry to give maximum layers of puff pastry in the final product.
Make sure your final turn includes a full 30 minutes chilling.
This pastry will keep for up to 3 days in the fridge or at least a month in the freezer.
Bakewell Tart
Serves: 8 to 10
Bakewell, a small town in Derbyshire, East Midlands is the origin of this famous tart. Living in The Midlands, we often went on day trips to the beautiful Derbyshire Peak District where a visit always included a stop at a tea shop and a slice of Bakewell tart.
There is much controversy over the origins of the Bakewell Tart. First mentioned in 1820 and then again in 1859, the stories contradict one another, but one thing they do agree on is that the cook got it wrong. So whether strawberry tart went wrong or an egg mixture over a pastry cake was put in the wrong way round, we shall probably never know. In 1861, Mrs Beeton included the puff pastry version in her cookery book.
Today the most popular recipe uses shortcrust pastry, raspberry jam and an almond sponge close in type to a French frangipane. Sometimes topped with icing and glacé cherries, sometimes with flaked almonds. The recipe for Bakewell Tart I use and have included here, is topped with flaked almonds and drizzled with icing. Personally, I find a full icing over the sponge to be too sweet and cloying. Some tarts are made with puff pastry and strawberry jam, others with shortcrust pastry and raspberry jam. We love the shortcrust version and to enhance the almond flavour I use ground almonds in the shortcrust pastry too. This recipe is one of my son's favourites as he loves almonds.
Ingredients
Almond pastry:
Almond sponge:
Jam:
Icing:
Preheat oven:
Grease and line:
I like to make my pastry in a stand mixer – I have warm hands and that is not good for pastry making! Besides, using the mixer is much quicker and easier whilst still producing excellent pastry. Many friends have asked me for my pastry making secret but there isn't one – I use my trusty KitchenAid every time and it hasn't let me down yet!
Sift flour and salt into the mixing bowl of a stand mixer.
Add ground almonds, caster sugar, and cubes of butter. With the beating paddle attached, mix on slow until the mixture resembles fine breadcrumbs.
Briefly whisk egg yolk and water in a small bowl before pouring on to the pastry mix.
Mix on slow (number 2 speed) until the pastry forms. This shouldn't take very long at all, less than a minute – you don't want to overwork the pastry.
![]() Freeze leftover egg white as it freezes exceptionally well. I keep egg white this way until I have enough to make a meringue.
Freeze leftover egg white as it freezes exceptionally well. I keep egg white this way until I have enough to make a meringue.
Wrap pastry in cling film/ plastic wrap and leave in the fridge for 30 minutes, until firm but not hard. It is essential to give the pastry a rest to ensure good results. Unlike bread which requires full gluten development, a good pastry requires the opposite and chilling retards the gluten.
Flour work surface or pastry board. Use as little flour as possible.
Roll out pastry to about the thickness of a £1 coin (1/8 ins), making sure the pastry circle is large enough for the diameter of your flan tin plus twice its depth.
![]() Flour the rolling pin by rubbing flour around it – you tend not to use so much this way and the flour goes where it is needed.
Flour the rolling pin by rubbing flour around it – you tend not to use so much this way and the flour goes where it is needed.
Gently roll your pastry loosely around the floured pin and lift it over the flan tin. Carefully unroll the pastry so it drapes loosely over the flan tin.
Use a small ball of spare pastry to press the pastry case onto the base of the tin and then up the sides, avoiding air pockets and tears. Take care not to stretch the pastry as it will only shrink back later.
Return to the fridge and chill for 15 minutes – this helps prevent shrinkage.
Using a fork, prick the bottom of the case.
Scrunch up a 30 cm (12 ins) diameter circle of baking parchment, flatten it out and then gently press it into your pastry case to cover the base and the sides. Scrunching up the parchment makes it more flexible and easier to achieve a snug fit between parchment and pastry, particularly where the sides of your pastry case meet the base.
Fill with ceramic beans (or like me, use dried beans) and bake in the oven for 15 minutes.
Remove from the oven and carefully set aside the paper and beans.
Pop back in the oven for 5 minutes to crisp up the bottom.
After removing your baked pastry case, turn down your oven to
350°F / 180°C / Gas Mark 4.
Sponge/frangipane filling:
Put all the ingredients for the sponge into a mixing bowl and beat together for 2 to 3 minutes.
Spread the raspberry jam evenly over the base of the pastry case.
Pour sponge mixture on the top and smooth over to level.
Sprinkle over flaked almonds.
Pop in the oven and cook for 30 minutes
Check the sponge is cooked by pressing gently with your finger; if the sponge springs back, it's cooked. If you prefer, use a cake tester or skewer and push it into the centre of the sponge; when removed the cake tester comes out clean if the sponge is cooked.
Lemon icing:
Sift icing sugar into a bowl.
Add lemon juice and mix ingredients together.
Add water 1 teaspoon at a time, you do not want the icing too runny.
Drizzle the icing onto the Bakewell with a large spoon to produce a lattice effect. Alternatively, put icing into a bag and pipe on a lattice effect.
Treacle Tart
Makes: 8 to 10 slices
If you have a sweet tooth, you have to try this! Equally at home with a good custard, fresh cream or ice cream, it is delicious. My best friend and I have great memories of eating treacle tart whilst walking along the beach to her grandma's house.
It's a very simple tart, in essence made up from “leftovers” – leftover pastry and breadcrumbs made from leftover bread.
![]() Never throw bread away, unless you need to feed the birds! Break up your bread and simply whizz in a blender or food processor to form breadcrumbs. Keep your breadcrumbs in the freezer – I add small amounts at a time, write the date on the bag and fill it up as I go. Really useful for treacle tarts, stuffings, meatballs, etc.
Never throw bread away, unless you need to feed the birds! Break up your bread and simply whizz in a blender or food processor to form breadcrumbs. Keep your breadcrumbs in the freezer – I add small amounts at a time, write the date on the bag and fill it up as I go. Really useful for treacle tarts, stuffings, meatballs, etc.
These days you may find treacle tart in a top restaurant as a dessert, usually with the addition of eggs and cream. This recipe is an old–fashioned treacle tart and if you have any wholemeal breadcrumbs, use them – it takes the flavour to another level.
Ingredients
Preheat oven:
Grease and line:
Flour work surface or pastry board. Use as little flour as possible.
Roll out pastry to about the thickness of a £1 coin (1/8 ins), making sure the pastry circle is large enough for the diameter of your flan tin plus twice its depth.
![]() Flour the rolling pin by rubbing flour around it – you tend not to use so much this way and the flour goes where it is needed.
Flour the rolling pin by rubbing flour around it – you tend not to use so much this way and the flour goes where it is needed.
Gently roll your pastry loosely around the floured pin and lift it over the flan tin. Carefully unroll the pastry so it drapes loosely over the flan tin.
Use a small ball of spare pastry to press the pastry case onto the base of the tin and then up the sides, avoiding air pockets and tears. Take care not to stretch the pastry as it will only shrink back later.
Return to the fridge and chill for 15 minutes – this helps prevent shrinkage.
Using a fork, prick the bottom of the case.
Make the filling by warming the golden syrup in a medium saucepan over a low heat until it becomes more fluid.
Stir in the breadcrumbs, lemon zest and lemon juice; add ginger if using.
![]() If the mixture seems too liquid or “runny” (it needs to be fairly thick) add another tablespoon of breadcrumbs. On the other hand, if it is too dry, add another small spoonful of syrup.
If the mixture seems too liquid or “runny” (it needs to be fairly thick) add another tablespoon of breadcrumbs. On the other hand, if it is too dry, add another small spoonful of syrup.
Pour the mixture into the pastry case and level.
Try not to press the mixture too much or you will end up with a dense tart!
Pop in the oven and bake for 30 to 35 minutes until the pastry is golden brown.
Delicious served warm with custard, cream or ice cream.
Lemon Meringue Pie
Makes: 8 to 10 slices
You cannot beat a home–made lemon meringue pie. I well remember as a child watching my mum make the filling and meringue from a packet. It was the 1970s and packet mixes were all the rage and heralded as a massive timesaver for the overworked housewife. It wasn't until I was married that I attempted my first home–baked lemon meringue pie. It really is very easy and just as quick as the packet mixes my mum used to make.
Ingredients
Pastry case:
Lemon Filling:
Meringue:
Grease and line:
Preheat oven:
Flour work surface or pastry board. Use as little flour as possible.
Roll out pastry to about the thickness of a £1 coin (1/8 ins), making sure the pastry circle is large enough for the diameter of your flan tin plus twice its depth.
![]() Flour the rolling pin by rubbing flour around it – you tend not to use so much this way and the flour goes where it is needed.
Flour the rolling pin by rubbing flour around it – you tend not to use so much this way and the flour goes where it is needed.
Gently roll your pastry loosely around the floured pin and lift it over the flan tin. Carefully unroll the pastry so it drapes loosely over the flan tin.
Use a small ball of spare pastry to press the pastry case onto the base of the tin and then up the sides, avoiding air pockets and tears. Take care not to stretch the pastry as it will only shrink back later.
Return to the fridge and chill for 15 minutes – this helps prevent shrinkage.
Using a fork, prick the bottom of the case.
Scrunch up a 30 cm (12 ins) diameter circle of baking parchment, flatten it out and then gently press it into your pastry case to cover the base and the sides. Scrunching up the parchment makes it more flexible and easier to achieve a snug fit between parchment and pastry, particularly where the sides of your pastry case meet the base.
Fill with ceramic beans (or like me, use dried beans) and bake in the oven for 15 minutes.
Remove from the oven and carefully set aside the paper and beans.
Pop back in the oven for 5 minutes to crisp up the bottom.
After removing your baked pastry case, turn down your oven to 350°F / 180°C / Gas Mark 4.
To make the lemon filling, place lemon zest and lemon juice into a medium sized heatproof bowl.
Add the cornflour and stir to make a smooth paste.
Add 275 ml (10 fluid oz) of boiling water and whisk.
At this point you can thicken the mixture by placing the bowl in a microwave on full power, 1 minute at a time, whisking and returning to the microwave for a further minute if necessary.
It will only take 1 or 2 minutes depending on the power of your microwave – I like this method because there is less washing up.
If you prefer to use a saucepan rather than a microwave, pour the mixture into a pan and whisk over a low heat until it boils and thickens.
Remove from the heat source and beat in the egg yolks.
Working as quickly as possible, add sugar and butter and continue to whisk until smooth.
Pour onto the pastry case and spread evenly.
To make the meringue, whisk the egg whites in a large grease free bowl until they stand in soft peaks.
Add sugar, a tablespoon at a time, whisking after each addition until you have a stiff, glossy meringue.
![]() I spent years fretting about over–whisking egg whites and I was always expecting my meringue to collapse. Eventually I stopped worrying and now realise you need to go a long way before you over–whisk egg whites for a meringue. I use a KitchenAid, which has a very powerful motor, and even though I whisk egg whites for up to 10 minutes on number 6 speed, my meringue has never collapsed! You need a stiff meringue or you will end up with syrup leakage and a sticky gloop.
I spent years fretting about over–whisking egg whites and I was always expecting my meringue to collapse. Eventually I stopped worrying and now realise you need to go a long way before you over–whisk egg whites for a meringue. I use a KitchenAid, which has a very powerful motor, and even though I whisk egg whites for up to 10 minutes on number 6 speed, my meringue has never collapsed! You need a stiff meringue or you will end up with syrup leakage and a sticky gloop.
Pile the meringue, making as many peaks as you can, on top of the lemon filling. Make sure there are no gaps in the meringue so no lemon filling is visible.
Place the tart on a baking tray and pop in the oven for 20 to 25 minutes until you have a light golden meringue.
Leave to cool for 10 minutes before removing from flan tin.
Lemon Meringue Pie is ideally served at room temperature, but if you cannot wait, you can eat it warm – we love it like this. Equally it can be served chilled from the fridge if you have any leftovers which made it that far!
Blackberry and Apple Crumble Tart
Makes: 8 to 10 portions
This recipe came about one day when the family couldn't decide between a pie or a crumble for pudding. Always trying to please, I did a combination of the two. I didn't have a recipe but I had seen a crumble tart in a restaurant which was simply pastry, fruit and a crumble topping. You can, of course, use any fruit filling you like: apple, apple and raspberry, gooseberries, blackcurrants, etc. Rhubarb makes a great filling but you need to be careful as it can turn out a little too “runny”.
Note: It was suggested I clarify what I mean by “porridge oats”, one of the ingredients in this recipe. In the UK, porridge oats are simply rolled oats but I'm told some parts of North America use the term “oatmeal”.
Ingredients
Pastry Case:
Crumble Mix:
Fruit Filling:
Preheat oven:
Grease and line:
To make the pastry case:
Flour work surface or pastry board. Use as little flour as possible.
Roll out pastry to about the thickness of a £1 coin (1/8 ins), making sure the pastry circle is large enough for the diameter of your flan tin plus twice its depth.
![]() Flour the rolling pin by rubbing flour around it – you tend not to use so much this way and the flour goes where it is needed.
Flour the rolling pin by rubbing flour around it – you tend not to use so much this way and the flour goes where it is needed.
Gently roll your pastry loosely around the floured pin and lift it over the flan tin.
Carefully unroll the pastry so it drapes loosely over the flan tin.
Use a small ball of spare pastry to press the pastry case onto the base of the tin and then up the sides, avoiding air pockets and tears.
Take care not to stretch the pastry as it will only shrink back later.
Return to the fridge and chill for 15 minutes – this helps prevent shrinkage.
Using a fork, prick the bottom of the case.
Scrunch up a 30 cm (12 ins) diameter circle of baking parchment, flatten it out and then gently press it into your pastry case to cover the base and the sides. Scrunching up the parchment makes it more flexible and easier to achieve a snug fit between parchment and pastry, particularly where the sides of your pastry case meet the base.
Fill with ceramic beans (or like me, use dried beans) and bake in the oven for 15 minutes.
Remove from the oven and carefully set aside the paper and beans.
Pop back in the oven for 5 minutes to crisp up the bottom.
To make the crumble topping:
Sift flour into a medium–sized bowl.
Rub the fat into the flour until it resembles large breadcrumbs.
Stir in sugar, porridge oats and sunflower seeds or almonds.
To make the filling:
Peel, core and slice apples.
Mix with blackberries, sugar and cornflour and arrange over pastry case.
Spread crumble mix over the top of the fruit.
Pop in the oven for approximately 30 minutes until golden brown.
Leave to cool in the tin for 10 minutes before removing tart.
Delicious served straight away or cold. Serve with hot custard, thick cream or ice cream. You could try it on its own of course!
Sticky Toffee Pudding Tart
Makes: 8 – 10 portions
Once we had tried blackberry and apple crumble tart, I wondered which other favourite pudding might work as a tart? The answer, sticky toffee pudding, using the caramel sauce under the sponge like the raspberry jam in a Bakewell tart. Our sticky toffee pudding recipe doesn't have dates in it, my family for some reason don't enjoy them, so this recipe uses sultanas/golden raisins instead.
Ingredients
Pastry Case:
Caramel Sauce:
Sponge:
Preheat oven:
Grease:
To make the pastry case:
Flour work surface or pastry board. Use as little flour as possible.
Roll out pastry to about the thickness of a £1 coin (1/8 ins), making sure the pastry circle is large enough for the diameter of your flan tin plus twice its depth.
![]() Flour the rolling pin by rubbing flour around it – you tend not to use so much this way and the flour goes where it is needed.
Flour the rolling pin by rubbing flour around it – you tend not to use so much this way and the flour goes where it is needed.
Gently roll your pastry loosely around the floured pin and lift it over the flan tin. Carefully unroll the pastry so it drapes loosely over the flan tin.
Use a small ball of spare pastry to press the pastry case onto the base of the tin and then up the sides, avoiding air pockets and tears. Take care not to stretch the pastry as it will only shrink back later.
Return to the fridge and chill for 15 minutes – this helps prevent shrinkage.
Using a fork, prick the bottom of the case.
Scrunch up a 30 cm (12 ins) diameter circle of baking parchment, flatten it out and then gently press it into your pastry case to cover the base and the sides. Scrunching up the parchment makes it more flexible and easier to achieve a snug fit between parchment and pastry, particularly where the sides of your pastry case meet the base.
Fill with ceramic beans (or like me, use dried beans) and bake in the oven for 15 minutes.
Remove from the oven and carefully set aside the paper and beans.
Pop back in the oven for 5 minutes to crisp up the bottom.
To make the caramel sauce:
Melt the butter and sugar together in a saucepan until bubbling. Do this slowly so you don't have to stir the mixture too much – this will also avoid burning it as well.
When the sugar is dissolved and the liquid is very hot take the saucepan off the heat and stir in the cream.
Return the saucepan to a low heat, cook gently until nice and thick.
![]() Don't cook cream on a high heat or it will separate.
Don't cook cream on a high heat or it will separate.
To make the sponge:
Pour the boiling water onto the fruits and add bicarbonate of soda; stir well. (You can use a mixing bowl or a jug)
Place the beaten eggs, margarine (or butter), sugar baking powder and flour into a bowl and beat with a wooden spoon or an electric mixer for a couple of minutes.
Add the vanilla essence and the coffee extract to the cooled fruit mix.
Pour the liquid from the fruit into the bowl with the other ingredients.
Blend well.
Add the fruit to the mixture and mix well.
The result will be a batter like consistency.
Spread caramel sauce over pastry case.
![]() If the caramel sauce is to stiff, warm gently for 10 to 20 seconds to soften and make more fluid.
If the caramel sauce is to stiff, warm gently for 10 to 20 seconds to soften and make more fluid.
Spread the sponge mixture over the top.
Turn oven down to: 350°F / 180°C / Gas Mark 4
Bake in the oven for approximately 35 minutes or until no imprints remain after the top of the sponge is pressed gently with your fingers.
Remove from the oven and leave for 10 minutes in the tin.
Serve warm with a good cream – try clotted cream or Guernsey cream.
Mince Pies
Makes: 12
Although I usually have plenty of pastry in the freezer and jars of home–made mincemeat at the ready, it seems I cannot make enough mince pies at Christmas time – even with batch baking and freezing. Living in France for the past seven years, I have made even more mince pies as they're not readily available there. I made mince pies for the choir carol singing practices, the church carol services and our French neighbours who love them.
Ingredients
Preheat oven:
Grease:
Roll out the pastry on a floured work surface to about the thickness of a £1 coin (1/8ins).
Cut out 12 tops and 12 bottoms for the pies to fit the size of your bun tin, gathering up scraps and re–rolling as you go.
Line the bottoms of the tins with the larger circles of pastry.
Fill with mincemeat just under the level of the pastry – not too much or you will have sugar/treacle leakage. About 1 heaped teaspoon should be enough for a 7.5 cm (3 ins) bottom and 6 cm (2 ½ inch) top.
![]() Perk up your mincemeat with a tablespoon of brandy or whisky.
Perk up your mincemeat with a tablespoon of brandy or whisky.
Dampen the edges of the smaller circles with water and press them lightly onto the top of the pastry and mincemeat.
Brush with milk or egg wash.
Snip the centre of each pie with scissors or prick with a fork.
Pop into the oven on the top shelf for 18 to 20 minutes until pale golden – your pies will be cooked sooner if you're using a smaller bun tin.
Dredge with caster sugar and remove from the tin after about 10 minutes.
Great served with Brandy butter!
Mince pies will keep for up to 7 days in an airtight container and they freeze exceptionally well, keeping for up to a month in a freezer.
Yorkshire Cheesecake Tarts
Makes: Approximately 2 dozen
You may be wondering why I've included a cheesecake recipe in English Teatime Treats when cheesecake is generally considered synonymous with America. Well, cheesecakes were made in England during Tudor times, often securing a special place on a feast day table. Cheesecakes were so special because they contained saffron, a spice which even in recent times was still more expensive than gold. During the 1750s cheesecake recipes adapted to replace saffron with nutmeg and include breadcrumbs as an ingredient.
This recipe is somewhat different from a cheesecake as most people might think of it and is loosely based on a regional speciality, the Yorkshire Curd Tart. Curd tart is a variation of cheesecake which uses the fresh curd produced from the cheese making process. There are a variety of recipes for this delicious treat with competitions held to judge the best curd tart. The recipe I use here makes for a very quick finished cheesecake tart as I use ready made ricotta cheese; you could of course make your own curd cheese and use that.
Ingredients
Preheat oven:
Grease:
Place currants into a bowl and sprinkle with brandy.
On a lightly floured work surface, rolled out the pastry to the thickness of a £1 coin (1/8 ins).
Use pastry cutter (check the size of your tin) to stamp out 24 circles for the base of the tarts.
Line the bun tins and pop in the fridge to chill for 30 minutes.
In a large bowl beat the cheese and butter together.
Add the rest of the ingredients and give the mixture a good stir.
Don't worry if your mixture looks a little wet, this is okay.
Put a generous dessert spoon full of the mixture into each chilled pastry case.
Pop in the oven of 15 to 18 minutes until the cheesecake tarts start to brown.
Serve warm from the oven.
Great Grandma's Coconut Currant Tarts
Makes: 2 dozen
My grandma used to make these and although she never did tell me her recipe, when she tried one of mine, she gave it the formal seal of approval. As a child I thought these were the only cakes she baked; I don't think this was true of course, it just seemed that way to me at the time. Whenever I visited, as a child or as a grown–up with my own children, Grandma would make these little tarts to have with a cup of tea in a china cup – I've never seen them anywhere else. I wish she was still here so we could check the recipe details. I hope you enjoy them.
Ingredients
Preheat oven:
400°F / 200°C / Gas Mark 6
Grease:
2 x 12 hole bun tins/pans
On a lightly floured work surface, roll out the pastry to the thickness of a £1 coin (1/8 ins).
Use a pastry cutter (check the size of your tin) to stamp out 24 circles for the base of the tarts.
Line the bun tins and pop in the fridge to chill for 30 minutes.
Add the egg, sugar, butter or margarine, self raising flour, coconut and 1 tablespoon of milk to the bowl of a stand mixer and beat together for 1 to 2 minutes.
Add currants and beat just enough to incorporate.
If the mixture feels too stiff (it should be able to drop off a spoon) add one more tablespoon of milk and mix again.
Drop a half teaspoon of raspberry jam into each tart case.
Add a generous spoonful of coconut currant mixture onto the top of the jam.
Pop tarts into the oven for 15 to 20 minutes until golden brown.
Eccles Cakes
Makes: 10 to 12
Eccles cakes continue the theme of delicious currant based cakes and when served warm from the oven they're extra special. If you're short of time, buy ready–made puff pastry and they'll be prepared in a flash.
Eccles cakes are named after the town and references to James Birch selling them from his shop on Vicarage Road in Eccles during 1793 are often cited. However, Eccles cakes were in existence long before that and it's thought these little currant cakes developed from the mince pie, providing fruit and spice all year round. In fact Eccles cakes are more like pies (cakes doesn't really describe them) and they are very rich – so rich in fact, Puritans banned them in the 1600s for being too extravagant and it's said a term in prison awaited anyone caught eating an Eccles cake!
Ingredients
Preheat oven:
Grease and line:
Beat softened butter and dark brown sugar together in a bowl for approximately 2 minutes until creamed. Stir in currants, marmalade, nutmeg and cinnamon. This is your filling.
Roll out pastry on a floured work surface, using as little flour as possible. Roll to about the thickness of a £1 coin (1/8 ins).
Using a 7.5 cm (3 ins) plain pastry cutter/cookie cutter, cut out as many circles as you can. Reuse leftover pieces but roll them out again as little as possible.
Divide the filling between the pastry circles (about a heaped dessert spoon) and place in the centre of each circle.
Dampen the edges of the pastry with water and gather the edges together to enclose the filling.
Turn the filled circles over and give them a gentle roll so they flatten out to about 7.5 cm (3 ins).
Make 3 small cuts on the top of each cake and place on baking tray.
![]() If you have time, chill in the fridge for 20 minutes. You will get a better puff on your pastry as the trapped air is chilled and will expand in the heat of the oven.
If you have time, chill in the fridge for 20 minutes. You will get a better puff on your pastry as the trapped air is chilled and will expand in the heat of the oven.
Lightly brush with beaten frothy egg white.
Sprinkle with plenty of sugar and pop in the oven straightaway.
Cook for 15 minutes until golden brown and puffed up.
You need to eat these as fresh as possible but I'm sure this won't be a problem – they won't last long as they are delicious warm from the oven served with an obligatory cup of tea.
Nelson Slice
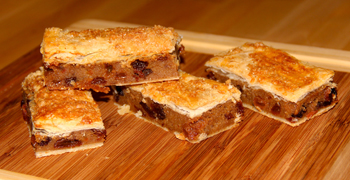
Makes: 6 to 10 slices
Nelson slice is essentially a bread pudding sandwiched between two layers of flaky pastry and coated with sugar. Bread pudding itself is primarily spiced up leftover bread and milk – it is not a bread–and–butter pudding and it's eaten as a cake. I've never seen a recipe printed in a book for a Nelson Slice, although some searches and responses on the internet make reference to an out of print book. Many years ago, my best friend and I would buy this cake from our local bakery as a treat on a weekend – it's a very filling treat, so don't eat it too close to mealtime. When our children were young we would go to the same bakery and let our children choose a cake; my eldest son always chose a Nelson slice.
The origins of Nelson slice are uncertain, with speculation about nautical connections to the great admiral including a cake known as a Nelson Square, apparently once popular in the Portsmouth area.
Ingredients
Preheat oven:
Grease and line:
Break the bread into small pieces and place in a large mixing bowl.
Pour over milk and leave for at least half an hour for the bread to soak up the milk.
Roll out the pastry thinly on a lightly floured work surface to a large rectangle 44 cm (17 ins) x 22 cm (8 ½ ins) and cut in two.
Line the bottom of the baking tin with one square of pastry and prick the bottom with a fork.
Place the other square of pastry on top of a piece of parchment paper and place in the baking tin.
Pop in the fridge to chill while you make the bread pudding.
Beat the bread mixture with a wooden spoon to make sure the bread is well mashed.
Add melted butter, soft brown sugar, spices, lemon zest, flour and beaten egg and beat again until you cannot recognise any lumps of bread.
Add the dried fruit and marmalade – mix well.
Take the baking tin from the fridge, take off the top layer of pastry and set to one side.
Spread the bread pudding mixture evenly over the bottom layer of pastry.
Cover the bread pudding mixture with the other pastry layer.
Brush with frothy egg white and sprinkle with demerara sugar.
Bake in the oven for 1 to 1 ¼ hours.
Cover with foil after an hour of cooking if the pastry starts to “catch”.
Leave in the tin to cool.
Cut into slices and enjoy.
Keep in an airtight container.
Chapter 4: Biscuits/Cookies
In this chapter you will find the biscuits I bake the most of at home and I feel sure once you get the bug for biscuit baking, you'll not want to buy mass produced biscuits. We can investigate the various interpretations of the word biscuit online but for the purposes of this book about English Teatime Treats, a biscuit (for anyone wondering) is what I understand Americans might refer to as a cookie, or perhaps a cracker – although in England a cookie is generally softer than a biscuit and a cracker is usually a baked savoury snack to go with cheese, etc. Hopefully, you can see why I want to avoid the quagmire of interpretation surrounding the word biscuit.
In practical terms, try out our favourite recipes for biscuits and enjoy eating them.
Biscuits are inextricably linked with English teatime but they often accompany a cup of tea at any time of the day. Regardless of the time, debate remains though, to dunk or not to dunk? When biscuits were originally made as a staple for sailors and soldiers, they were baked so hard (and referred to as “hardtack”) it was essential to rehydrate them by dunking in liquid. Perhaps this explains the origin of our dunking biscuits!
I know this book is called English Teatime Treats but I just had to include a recipe for Scottish shortbread. After all, shortbread very often features on afternoon tea tables, be they English or otherwise. Sprinkled with caster sugar it makes a lovely handmade gift at Christmas and beats hands down any mass produced shortbread in fancy tins at extortionate prices.
Once living in France we were trying as much as possible to produce our own food so although we did buy and enjoy local Breton Galette biscuits, my biscuit baking increased. Some days I'd make several batches to feed hungry visitors and I well remember one August holiday when there were sixteen of us living on site and everyone liked tea and biscuits. Luckily our favourite everyday biscuit recipe was enough to keep the troops going and it seems only right now that I share it as the first biscuit recipe in this book.
Oat Biscuits
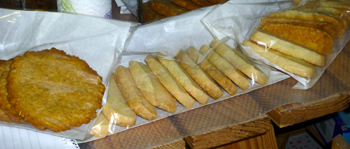
Makes: 16
I make these biscuits almost every day although I try not to eat too many of them every day. They are, dare I say it, fool proof and there isn't even any rolling out. I also use these biscuits for cheesecake bases and many people have asked where I buy the biscuits used in their cheesecakes!
Note: It was suggested I clarify what I mean by “porridge oats”, one of the ingredients in this recipe. In the UK, porridge oats are simply rolled oats but I'm told some parts of North America use the term “oatmeal”.
Ingredients
Preheat oven:
Grease and line:
Melt margarine or butter, sugar and golden syrup in a bowl in the microwave for 2 minutes or until just melted. Stir well. (Alternatively, melt in a large saucepan)
Tip in flour, baking powder and oats and stir again.
Your mixture should come together in a big ball but it may be a bit too sticky. If so, add a little more flour as the aim is to get a sticky but pliable biscuit dough.
Divide into 16 equal sized balls – divide mixture in half, then each half into four, then each piece in half again is an easy way to get roughly equal pieces.
Use your fingers to flatten each ball on a baking tray.
You should be able to get 8 biscuits on each tray – as you flatten the balls each one does take up a fair bit of room.
Pop in the oven for 12 to 15 minutes or until golden, depending on your oven. You may need to turn the trays around during cooking to ensure an even bake but again, that depends on your oven. It's certainly worthwhile checking because if left too long your biscuits will burn.
![]() Don't cook your biscuits for too long, they will harden up as they cool. If they are too soft after cooling, you can always pop them back in the oven for 5 minutes.
Don't cook your biscuits for too long, they will harden up as they cool. If they are too soft after cooling, you can always pop them back in the oven for 5 minutes.
Variations:
These are just a few suggestions, have a go with your own favourite flavours.
Gingernuts
Makes: 16
This is the first biscuit I made in France, gingernuts being one of my husband's favourites and our stash of McVities bought in the UK having run out. The bicarbonate of soda/baking soda gives the characteristic “crazy paving” look to gingernuts.
Ingredients
Preheat oven:
Grease and line:
Sift flour, bicarb and ginger into a large bowl.
Add margarine and rub in until it resembles large breadcrumbs.
Add sugar and stir.
Add golden syrup and mix to a stiff but sticky paste.
![]() If your golden syrup is too firm, remove the lid and pop the jar in the microwave for 10 seconds at a time until the syrup is softer. It will be easier to measure out and easier to mix.
If your golden syrup is too firm, remove the lid and pop the jar in the microwave for 10 seconds at a time until the syrup is softer. It will be easier to measure out and easier to mix.
If your mixture is too wet and not just sticky, add a little flour – be careful though as you do want a sticky mix.
Divide the mix into 16 even sized pieces.
Roll each piece into a ball and place on the baking sheet, making sure there is plenty of room because they do spread.
Press each ball to flatten slightly.
Pop in the oven 12 to 15 minutes.
Leave them to cool on the trays for at least 10 minutes to firm up before placing on a wire rack.
Store in an airtight tin – if they last that long!
Flapjack
Makes: 12 – 16 portions
Flapjack is so easy to make and a great one for children to get involved with, not least because there are so many flapjack variations to try. We tend to like our flapjack with more oats than most recipes (and prefer it in thick slices) so I believe this flapjack is different to American flapjack. I remember as a child reading Little Women and wondering what flapjack was because it didn't sound like the flapjack I knew. I suppose the recipe I've included here might be also be described as an oat cookie slice.
Note: It was suggested I clarify what I mean by “porridge oats”, one of the ingredients in this recipe. In the UK, porridge oats are simply rolled oats but I'm told some parts of North America use the term “oatmeal”.
Ingredients
Preheat oven:
Grease and line:
![]() I use a square silicone “tin” for flapjack. It's perfect, no greasing required and the flapjack tips out perfectly. Just be careful not to cut into the silicone when slicing up the flapjack.
I use a square silicone “tin” for flapjack. It's perfect, no greasing required and the flapjack tips out perfectly. Just be careful not to cut into the silicone when slicing up the flapjack.
Place sugar, margarine or butter and golden syrup in a large microwaveable bowl and pop in the microwave for 1 ½ to 2 minutes on full power to melt.
Stir.
Or if you prefer: place sugar, margarine or butter and golden syrup in a fairly large saucepan and heat gently until melted and then remove from heat.
Add porridge oats to your bowl or saucepan and give the mixture a good stir to thoroughly mix and coat the porridge oats.
Pour the mixture into the tin.
![]() Spread out the mixture evenly and press down firmly using a spatula or the back of a spoon. This will ensure a flapjack which does not fall apart while you're cutting it into slices or when you come to eat it.
Spread out the mixture evenly and press down firmly using a spatula or the back of a spoon. This will ensure a flapjack which does not fall apart while you're cutting it into slices or when you come to eat it.
Pop in the oven and cook for 45 to 50 minutes.
Remove from the oven and leave to cool for 15 minutes.
Run a knife around the inside of the baking tin and then cut into 12 or 16 even pieces.
Be patient (if you can) and leave in the baking tin until completely cold.
Flapjack will keep for up to a week stored in an airtight container.
Variations:
Chocolate Covered Flapjack
I love this because there is no extra washing up as I melt the chocolate straight on top of the flapjack while it's still warm. Make the flapjack as usual and soon as it comes out of the oven, place on top of the flapjack small squares of dark chocolate (about 100 g / 3 ½ oz). Once melted, smooth with a palette knife and proceed as before.
Breakfast Bar Flapjack
Substitute the porridge oats with muesli or granola.
Or leave the porridge oats in and add 110 g (4 oz) mixture of sunflower or pumpkin seeds.
Fruity Flapjack
Simply mix 110 g (4 oz) of either sultanas/golden raisins, chopped apricots or cranberries to the porridge oats.
You can adapt this recipe to include pretty much whatever ingredients you might like to add in. I have made suggestions based on our preferences but you can try out almost any of your favourite ingredients.
Shortbread Petticoat Tails
Makes: 24 petticoat tails
Originating from Edinburgh in Scotland but popular all over the UK. Apparently the favourite of Mary Queen of Scots in the 16th century, probably the reason for the petticoat tails rise to fame. An expensive treat in those days, appearing as a luxury at Christmas and of course, Hogmanay. Still a treat today and still given as Christmas presents. Our French friends loved them so much I couldn't keep up with the requests.
This recipe follows the classic 3:2:1 rule, i.e. three parts flour and cornflour or semolina, two parts butter and one part sugar. I like to use cornflour because it gives it a tender breadcrumb but if you prefer a crunchier shortbread use semolina instead. Shortbread needs a long slow cook to give an authentic pale golden colour.
Ingredients
Preheat oven:
Grease and line:
I use a stand mixer to make shortbread, it keeps mixing to a minimum and ensures a tender crunchy shortbread.
Warm your mixing bowl, not too hot though.
Add butter and sugar to the bowl and beat until creamed, which should take between one and two minutes depending on how soft your butter is and your mixer speed; number 4 to number 6 speed.
Sift flour and cornflour into a separate bowl and then add half to your creamed butter and sugar.
Start your mixer on slow (number 2 speed) to prevent the flour flying out of the bowl – mix for a few seconds.
Add the remainder of the flour mix and combine until it all comes together around the beater – about 1 minute.
(Alternatively, you can cream the butter and sugar together with a hand–held mixer or a wooden spoon in a large bowl.
Add the flour and cornflour in 3 or 4 batches and mix until the dough comes together. Don't overwork it.)
Transfer the dough to a floured work surface.
Roll out into a 22 cm (8 ins) round and place on a baking tray.
Lightly score with a knife into 12 segments and prick all over with a fork.
Optional: Shape edges with your finger or thumb to make a scallop edge.
![]() At this stage, I always put mine in the fridge for about 30 minutes, treating it just like pastry. The result, excellent shortbread.
At this stage, I always put mine in the fridge for about 30 minutes, treating it just like pastry. The result, excellent shortbread.
Remove from the fridge and bake in the oven for at least 45 minutes until pale golden in colour.
If the shortbread begins to turn brown before it is cooked, turn your temperature down by 10°.
Remove from the oven and sprinkle with sugar.
Using a very sharp knife, cut along the lines you made earlier.
Leave to cool.
Shortbread Fingers
Makes: 20 shortbread fingers
This recipe follows the classic 3:2:1 rule, i.e. three parts flour and cornflour or semolina, two parts butter and one part sugar. I like to use cornflour because it gives it a tender breadcrumb but if you prefer a crunchier shortbread use semolina instead. Shortbread needs a long slow cook to give an authentic pale golden colour.
Ingredients
Preheat oven:
Grease and line:
I use a stand mixer to make shortbread, it keeps mixing to a minimum and ensures a tender crunchy shortbread.
Warm your mixing bowl, not too hot though.
Add butter and sugar to the bowl and beat until creamed, which should take between one and two minutes depending on how soft your butter is and your mixer speed; number 4 to number 6 speed.
Sift flour and cornflour into a separate bowl and then add half to your creamed butter and sugar.
Start your mixer on slow (number 2 speed) to prevent the flour flying out of the bowl – mix for a few seconds.
Add the remainder of the flour mix and combine until it all comes together around the beater – about 1 minute.
(Alternatively, you can cream the butter and sugar together with a hand–held mixer or a wooden spoon in a large bowl.
Add the flour and cornflour in 3 or 4 batches and mix until the dough comes together. Don't overwork it.)
Transfer the dough to a floured work surface.
Divide the shortbread dough into 2 and shape into bars roughly 20 cm (8 ins) x 5cm (2ins) x 2.5 cm (1 ins).
Wrap separately in cling film/plastic wrap and put in the fridge for at least 30 minutes.
Remove from fridge and cut each bar into 10 equal slices.
Place on a baking sheet and pop in the oven for approximately 20 minutes. (Optional: prick the top surface of each biscuit with a fork).
Sprinkle with sugar.
![]() If you want a really crispy shortbread biscuit, turn off the oven a few minutes before the end of cooking time and leave in the oven for 30 minutes.
If you want a really crispy shortbread biscuit, turn off the oven a few minutes before the end of cooking time and leave in the oven for 30 minutes.
Store in an airtight container. Alternatively, you can freeze them as they freeze very well.
Variations:
Cranberry Shortbread
Add 50 g (2 oz) to 110g (4 oz) dried cranberries to your shortbread mixture after the first portion of flour.
Follow the remainder of the recipe either as shortbread petticoat tails or shortbread fingers.
Lemon Shortbread
Add zest of one lemon at the same time as the sugar.
Walnut Shortbread
Add 50 g (2 oz) chopped walnuts before the flour.
Chocolate Shortbread
Substitute 40 g (1 ½ oz) cocoa powder for plain flour.
Christmas Shortbread Cookies
Whilst in France, I was asked to make English Christmas end of term treats for a French primary school. The first year, I made mince pies and although they went down well with the adults, I think they were too rich for 8 year–old French children. So the following year, I made Scottish shortbread stars and mini Christmas trees. The children loved them and I made them for several years.
Follow the recipe for shortbread petticoat tails and instead of rolling out to form rounds, simply roll out and use cutters to make your Christmas shapes. This Christmas, in England, my family helped me cut out stars and Christmas bells for our Christmas gift bags.
Depending on their size, your seasonal goodies should cook in around 15 to 20 minutes.
Apple Shortbread
Makes: 8 large or 16 smaller portions.
This really is delicious, almost like a very rich apple pie with a thick pie crust.
Ingredients
Preheat oven:
Grease and line:
I use a stand mixer to make shortbread, it keeps mixing to a minimum and ensures a tender crunchy shortbread.
Warm your mixing bowl, not too hot though.
Add butter and sugar to the bowl and beat until creamed, which should take between one and two minutes depending on how soft your butter is and your mixer speed; number 4 to number 6 speed.
Sift flour and cornflour into a separate bowl and then add half to your creamed butter and sugar.
Start your mixer on slow (number 2 speed) to prevent the flour flying out of the bowl – mix for a few seconds.
Add the remainder of the flour mix and combine until it all comes together around the beater – about 1 minute.
(Alternatively, you can cream the butter and sugar together with a hand–held mixer or a wooden spoon in a large bowl.
Add the flour and cornflour in 3 or 4 batches and mix until the dough comes together. Don't overwork it.)
Transfer the dough to a floured work surface.
Divide your shortbread dough in half.
Roll out each half to form a square, one 21 cm (8 ins) square and the other slightly larger at 21.5 cm (8 ¼ ins) square.
Line the bottom of the tin with the slightly larger square, so the edges come slightly up the side of the tin.
Cover with cling film/plastic wrap and lay the top square of dough in the tin.
Pop in the fridge for 30 minutes.
Remove from the fridge and use the cling film/plastic wrap to lift off the top layer of dough; carefully set this to one side.
Spread the bottom shortbread layer with apple purée leaving a small gap around the edges.
Place on the top layer of shortbread and pinch the edges of the two layers together with your fingers to seal them.
Place in the oven for at least 45 minutes.
Remove from the oven, sprinkle with sugar and cut into 8 or 16 portions.
Leave to cool in the tin.
Best stored in an airtight tin.
Variation:
Mincemeat Shortbread
Shortbread works extremely well with mincemeat. Simply follow the apple shortbread recipe and substitute apple purée with 6 tablespoons of mincemeat. Cut into 16 pieces as this is a very rich treat.
Millionaire Shortbread
Makes: 16 – 24 pieces
A decadent twist on a Scottish classic. A rich, 3 in 1 combination of crisp shortbread, gooey caramel and a chocolate topping. Sold everywhere in the UK but you cannot beat home made. I have a super easy way to make the caramel in the microwave and the chocolate, well, that melts itself. So you've no excuse not to try the millionaire's lifestyle.
Ingredients
Shortbread:
Toppings:
Preheat oven:
Grease and line:
I use a stand mixer to make shortbread, it keeps mixing to a minimum and ensures a tender crunchy shortbread.
Warm your mixing bowl, not too hot though.
Add butter and sugar to the bowl and beat until creamed, which should take between one and two minutes depending on how soft your butter is and your mixer speed; number 4 to number 6 speed.
Sift flour and cornflour into a separate bowl and then add half to your creamed butter and sugar.
Start your mixer on slow (number 2 speed) to prevent the flour flying out of the bowl – mix for a few seconds.
Add the remainder of the flour mix and combine until it all comes together around the beater – about 1 minute.
(Alternatively, you can cream the butter and sugar together with a hand–held mixer or a wooden spoon in a large bowl.
Add the flour and cornflour in 3 or 4 batches and mix until the dough comes together. Don't overwork it.)
Roll out shortbread dough on a lightly floured work surface to a rough rectangle slightly smaller than your tin.
Carefully place the shortbread in the baking tin and press gently and evenly, easing it to fit the tin.
Prick all over with a fork.
Bake in the oven for at least 45 minutes until pale golden in colour.
Leave to cool in the baking tin.
To make caramel in the microwave:
Use a large microwaveable bowl and melt the butter for 2 to 3 minutes on full power.
Add the condensed milk and golden syrup and give the mix a good whisk.
Pop back in the microwave cooking on full power for 1 minute at a time for approximately 6 minutes. Check the caramel at the end of each minute's cooking – when it reaches a golden colour, it's ready.
![]() After each minute of cooking in the microwave, whisk to ensure a smooth caramel. Stop cooking when your caramel is a golden colour.
After each minute of cooking in the microwave, whisk to ensure a smooth caramel. Stop cooking when your caramel is a golden colour.
To make the caramel in a saucepan:
Melt the butter on a gentle heat.
Add the golden syrup and condensed milk, stirring to mix thoroughly.
Continue cooking on a medium heat until thick and golden in colour.
Your caramel should now be nice and thick and ready to pour over the shortbread.
Once poured, wait 5 minutes before you place small squares of chocolate on the top.
As soon as the chocolate has melted, smooth over with a palette knife.
Allow the caramel and chocolate to set and cool before cutting into portions. Store in an airtight container
![]() If the weather is very hot and you're struggling for the caramel and chocolate to set, cool in the fridge. Sometimes, cooling chocolate in the fridge is necessary – it means you won't get a shiny chocolate but it still tastes delicious.
If the weather is very hot and you're struggling for the caramel and chocolate to set, cool in the fridge. Sometimes, cooling chocolate in the fridge is necessary – it means you won't get a shiny chocolate but it still tastes delicious.
Variations:
3 types of chocolate
Place squares of white, dark and milk on the top of your caramel when it is hot and swirl together with a palette knife.
Peanut caramel
Add 2 tablespoons of roasted salted peanuts to the caramel, what a treat!
I've been experimenting with sugar boiling techniques to make caramel, particularly salted caramel. We love it and so far I've poured it over ice cream and meringues, spread it on oat biscuits and swirled it in our cheesecake mixture for a gorgeous toffee cheesecake. Christmas experiments included salted caramel with chocolate truffle and the shortbreads worked really well with caramel. My caramel recipe, complete with how to avoid sugar crystals, can be found on my website.
Grasmere Gingerbread
Makes: 12 pieces
The Lake District, for me, conjures up images of Wordsworth, Beatrix Potter and regional foods. There are many recipes to choose from when it comes to the Lake District town of Grasmere's gingerbread but the one used by the original Grasmere Gingerbread Shop itself remains a closely guarded secret which is stored in a Cumbrian bank vault.
Our favorite recipe is a simplified version and I hope you enjoy it.
Note: Similarly to my reference to porridge oats, it was suggested I clarify what I mean by “oatmeal”, one of the ingredients in this recipe. When I use the term oatmeal, I'm referring to whole oats which have been stone ground.
Ingredients
Preheat oven:
Grease and line:
Add the flour, oatmeal, sugar, ground ginger and baking powder to the bowl of a stand mixer with the beater attachment.
Add the diced butter and mix on number 2 speed until the mixture resembles fine breadcrumbs.
Take 4 tablespoons of the mixture and set aside for later.
Add the diced ginger to the main mix and beat for 30 seconds to incorporate.
Place the mixture into the baking tin. Use a spatula or the back of a spoon to firmly press into the tin.
Sprinkle the previously set aside 4 tablespoons of mixture on top.
Pop in the oven and bake until lightly golden in colour, approximately 25 minutes.
Loosen the edges with a palette knife and cut into 12 portions.
Leave in the tin to cool.
Store in an airtight container.
![]() In Brittany, France, I couldn't find oatmeal in the local shops and my stock from England had run out. So, as a last resort, I used my blender to whiz up some porridge oats. Although the fine textured result hadn't been stone ground as such, it worked perfectly.
In Brittany, France, I couldn't find oatmeal in the local shops and my stock from England had run out. So, as a last resort, I used my blender to whiz up some porridge oats. Although the fine textured result hadn't been stone ground as such, it worked perfectly.
Thank you …
for buying English Teatime Treats. I hope you've enjoyed reading it and have had time to savour some of the recipes.
I genuinely appreciate feedback on the individual recipes and the book as a whole, so if possible please leave your review on the Amazon website. Equally, feel free to Tweet, catch up with me on Facebook or visit my website.
Keep an eye out for my new titles which hopefully will be available soon. I've been writing these books over the last two years and I'm looking forward to them being published.